
| 일 | 월 | 화 | 수 | 목 | 금 | 토 |
|---|---|---|---|---|---|---|
| 1 | 2 | 3 | 4 | 5 | 6 | 7 |
| 8 | 9 | 10 | 11 | 12 | 13 | 14 |
| 15 | 16 | 17 | 18 | 19 | 20 | 21 |
| 22 | 23 | 24 | 25 | 26 | 27 | 28 |
- oracle
- 다형성
- EnhancedFor
- NestedFor
- 환경설정
- 오라클
- 메소드오버로딩
- exception
- 객체 비교
- 자바
- 한국건설관리시스템
- cursor문
- abstract
- 제네릭
- 컬렉션 타입
- Java
- 인터페이스
- 참조형변수
- 자동차수리시스템
- GRANT VIEW
- 컬렉션프레임워크
- 생성자오버로드
- 어윈 사용법
- 예외처리
- 추상메서드
- 대덕인재개발원
- 집합_SET
- 예외미루기
- 정수형타입
- 사용자예외클래스생성
- Today
- Total
거니의 velog
(13) 리덕스 미들웨어를 통해 비동기 작업 관리 3 본문
(2) redux-saga
* 이번에는 redux-saga를 통해 비동기 작업을 관리하는 방법을 알아보자. 이 미들웨어는 redux-thunk 다음으로 많이 사용하는 비동기 작업 관련 미들웨어이다.
* redux-thunk는 함수 형태의 액션을 디스패치하여 미들웨어에서 해당 함수에 스토어의 dispatch와 getState를 파라미터로 넣어서 사용하는 원리이다. 그래서 구현한 thunk 함수 내부에서 원하는 API 요청도 하고, 다른 액션을 디스패치하거나 현재 상태를 조회하기도 했다. 대부분의 경우에는 이전 절에서 배운 redux-thunk로도 충분히 기능을 구현할 수 있다.
* 이번에 배울 redux-saga는 좀 더 까다로운 상황에서 유용하다. 예를 들어 다음과 같은 상황에서는 redux-saga를 사용하는 것이 유리하다.
- 기존 요청을 취소 처리해야 할 때(불필요한 중복 요청 방지)

- 특정 액션이 발생했을 때 다른 액션을 발생키키거나, API 요청 등 리덕스와 관계없는 코드를 실행할 때

- 웹소켓을 사용할 때

- API 요청 실패 시 재요청해야 할 때
[1] 제너레이터 함수 이해하기
* redux-saga에서는 ES6의 제너레이터(generator) 함수라는 문법을 사용한다. 보통 일반적인 상황에서는 많이 사용되지 않기 때문에 초반에 진입 장벽이 있을 수 있다.
* 우선 제너레이터 함수 문법에 대해 알아보자. 이 문법의 핵심 기능은 함수를 작성할 때 함수를 특정 구간에 멈춰 놓을 수도 있고, 원할 때 다시 돌아가게 할 수도 있다는 것이다.
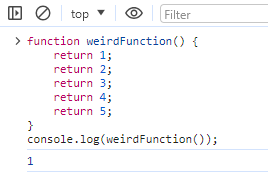
* 다음과 같은 함수가 있다고 가정해 보자.
function weirdFunction() {
    return 1;
    return 2;
    return 3;
    return 4;
    return 5;
}
console.log(weirdFunction());
* 하나의 함수에서 값을 여러 개 반환하는 것은 불가능하므로 이 코드는 제대로 작동하지 않는다. 정확히는 호출할 때마다 맨 위에 있는 값인 1이 반환된다.
* 하지만 제너레이터 함수를 사용하면 함수에서 값을 순차적으로 반환할 수 있다. 심지어 함수의 흐름을 도중에 멈춰 놓았다가 다시 이어서 진행시킬 수도 있다.
* 크롬 개발자 도구 콘솔에서 다음 함수를 한번 작성해 보자.
function* generatorFunction() {
    console.log('안녕하세요');
    yield 1;
    console.log('제너레이터 함수');
    yield 2;
    console.log('function*');
    yield 3;
    return 4;
}
* 제너레이터 함수를 만들 때는 function* 키워드를 사용한다.
* 함수를 작성한 뒤에는 다음 코드를 사용해 제너레이터를 생성하자.
const generator = generatorFunction();* 제너레이터 함수를 호출했을 때 반환되는 객체를 제너레이터라고 한다.
* 이제 다음 코드를 순차적으로 한 줄씩 입력하고 어떤 결과가 나타나는지 확인해 보자.
generator.next();
// 안녕하세요
// {value: 1, done: false}
generator.next();
// 제너레이터 함수
// {value: 2, done: false}
generator.next();
// function*
// {value: 3, done: false}
generator.next();
// {value: 4, done: true}
generator.next();
// {value: undefined, done: true}
* 제너레이터가 처음 만들어지면 함수의 흐름은 멈춰 있는 상태이다. next()가 호출되면 다음 yield가 있는 곳까지 호출하고 다시 함수가 멈춘다. 제너레이터 함수를 사용하면 함수를 도중에 멈출 수도 있고, 순차적으로 여러 값을 반환시킬 수도 있다. next 함수에 파라미터를 넣으면 제너레이터 함수에서 yield를 사용하여 해당 값을 조회할 수도 있다.
* 다음 예시 코드를 크롬 개발자 도구 콘솔에서 한번 입력해 보자.
function* sumGenerator() {
    console.log('sumGenerator가 만들어졌습니다.');
    let a = yield;
    let b = yield;
    yield a + b;
}

const sum = sumGenerator();
sum.next();
// sumGenerator가 만들어졌습니다.
// {value: undefined, done: false}
sum.next(1);
// {value: undefined, done: false}
sum.next(2);
// {value: 3, done: false}
sum.next();
// {value: undefined, done: true}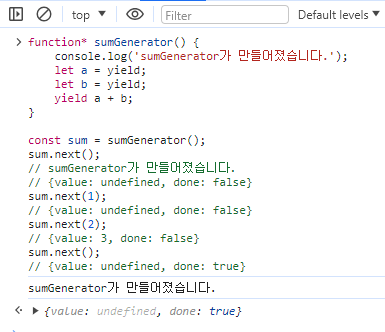
* redux-saga는 제너레이터 함수 문법을 기반으로 비동기 작업을 관리해 준다. 좀 더 이해하기 쉽게 설명하면, redux-saga는 우리가 디스패치하는 액션을 모니터링해서 그에 따라 필요한 작업을 따로 수행할 수 있는 미들웨어이다.
* 다음 예시 코드를 크롬 개발자 도구에서 한번 입력해 보자.
function* watchGenerator() {
    console.log('모니터링 중...');
    let prevAction = null;
    while(true) {
        const action = yield;
        console.log('이전 액션 : ', prevAction);
        prevAction = action;
        if(action.type === 'HELLO') {
            console.log('안녕하세요!');
        }
    }
}

const watch = watchGenerator();

watch.next();
// 모니터링 중...
// {value: undefined, done: false}
watch.next({ type: 'TEST' });
// 이전 액션 : null
// {value: undefined, done: false}
watch.next({ type: 'HELLO' });
// 이전 액션 : { type: 'TEST' }
// 안녕하세요
// {value: undefined, done: false}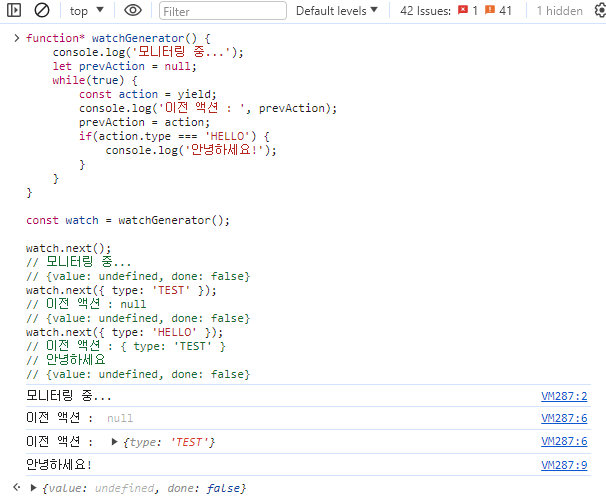
* redux-saga는 위 코드와 비슷한 원리로 작동한다. 제너레이터 함수의 작동 방식만 기본적으로 파악하고 있으면, redux-saga에서 제공하는 여러 유용한 유틸 함수를 사용하여 액션을 쉽게 처리할 수 있다.
[2] 비동기 카운터 만들기
* 기존에 thunk 함수로 구현했던 비동기 카운터를 이번에는 redux-saga를 사용하여 구현해 보자. 우선 라이브러리를 설치해 주자.
$ yarn add redux-saga* 그리고 counter 리덕스 모듈을 열어서 기존 thunk 함수를 제거하고, INCREMENT_ASYNC와 DECREMENT_ASYNC라는 액션 타입을 선언하자. 해당 액션에 대한 액션 생성 함수도 만들고, 이어서 제너레이터 함수를 만든다. 이 제너레이터 함수를 사가(saga)라고 부른다.
[modules/counter.js]
//import React from "react";
import { createAction, handleActions } from "redux-actions";
import { delay, put, takeEvery, takeLatest } from "redux-saga/effects";

const INCREASE = "counter/INCREASE";
const DECREASE = "counter/DECREASE";

const INCREASE_ASYNC = "counter/INCREASE_ASYNC";
const DECREASE_ASYNC = "counter/DECREASE_ASYNC";

export const increase = createAction(INCREASE);
export const decrease = createAction(DECREASE);

// 마우스 클릭 이벤트가 payload 안에 들어가지 않도록
// () => undefined를 두 번째 파라미터로 넣어 준다.
export const increaseAsync = createAction(INCREASE_ASYNC, () => undefined);
export const decreaseAsync = createAction(DECREASE_ASYNC, () => undefined);

function* increaseSaga() {
  yield delay(1000); // 1초를 기다린다.
  yield put(increase()); // 특정 액션을 디스패치한다.
}

function* decreaseSaga() {
  yield delay(1000); // 1초를 기다린다.
  yield put(decrease()); // 특정 액션을 디스패치한다.
}

export function* counterSaga() {
  // takeEvery는 들어오는 모든 액션에 대해 특정 작업을 처리해 준다.
  yield takeEvery(INCREASE_ASYNC, increaseSaga);
  // takeLatest는 기존에 진행 중이던 작업이 있다면 취소 처리하고
  // 가장 마지막으로 실행된 작업만 수행한다.
  yield takeLatest(DECREASE_ASYNC, decreaseSaga);
}

const initialState = 0; // 상태는 꼭 객체일 필요는 없다. 숫자도 잘 작동한다.

const counter = handleActions(
  {
    [INCREASE]: (state) => state + 1,
    [DECREASE]: (state) => state - 1,
  },
  initialState
);

export default counter;
* 그리고 루트 리듀서를 만들었던 것처럼 루트 사가를 만들어 주어야 한다. 추후 다른 리듀서에서도 사가를 만들어 등록할 것이기 때문이다.
[modules/index.js]
import { combineReducers } from "redux";
import { all } from "redux-saga/effects";
import counter, { counterSaga } from "./counter";
import sample from "./sample";
import loading from "./loading";

const rootReducer = combineReducers({ counter, sample, loading });

export function* rootSaga() {
  // all 함수는 여러 사가를 합쳐 주는 역할을 한다.
  yield all([counterSaga()]);
}

export default rootReducer;
* 이제 스토어에 redux-saga 미들웨어를 적용해 주자.
[index.js]
import React from "react";
import ReactDOM from "react-dom/client";
import "./index.css";
import App from "./App";
import reportWebVitals from "./reportWebVitals";
import { applyMiddleware, createStore } from "redux";
import rootReducer, { rootSaga } from "./modules";
import { Provider } from "react-redux";
// import loggerMiddleware from "./lib/loggerMiddleware";
import { createLogger } from "redux-logger";
import { thunk as ReduxThunk } from "redux-thunk"; // Import the 'thunk' function
import createSagaMiddleware from "redux-saga";

const logger = createLogger();
const sagaMiddleware = createSagaMiddleware();
const store = createStore(
  rootReducer,
  applyMiddleware(logger, ReduxThunk, sagaMiddleware)
);

sagaMiddleware.run(rootSaga);

const root = ReactDOM.createRoot(document.getElementById("root"));
root.render(
  <Provider store={store}>
    <App />
  </Provider>
);

reportWebVitals();
* 스토어에 미들웨어를 적용했다면 CounterContainer 컴포넌트를 App 컴포넌트에 렌더링하여 잘 작동하는지 확인해 보자. counter 리덕스 모듈이 변경되기는 했지만, 컨테이너 컴포넌트에서 수정해야 할 것은 없다. 왜냐하면, 기존에 사용 중이돈 thunk 함수와 똑같은 이름으로 액션 생성 함수를 만들었기 때문이다.
[App.js]
import React from "react";
import CounterContainer from "./containers/CounterContainer";

const App = () => {
  return (
    <div>
      <CounterContainer />
    </div>
  );
};

export default App;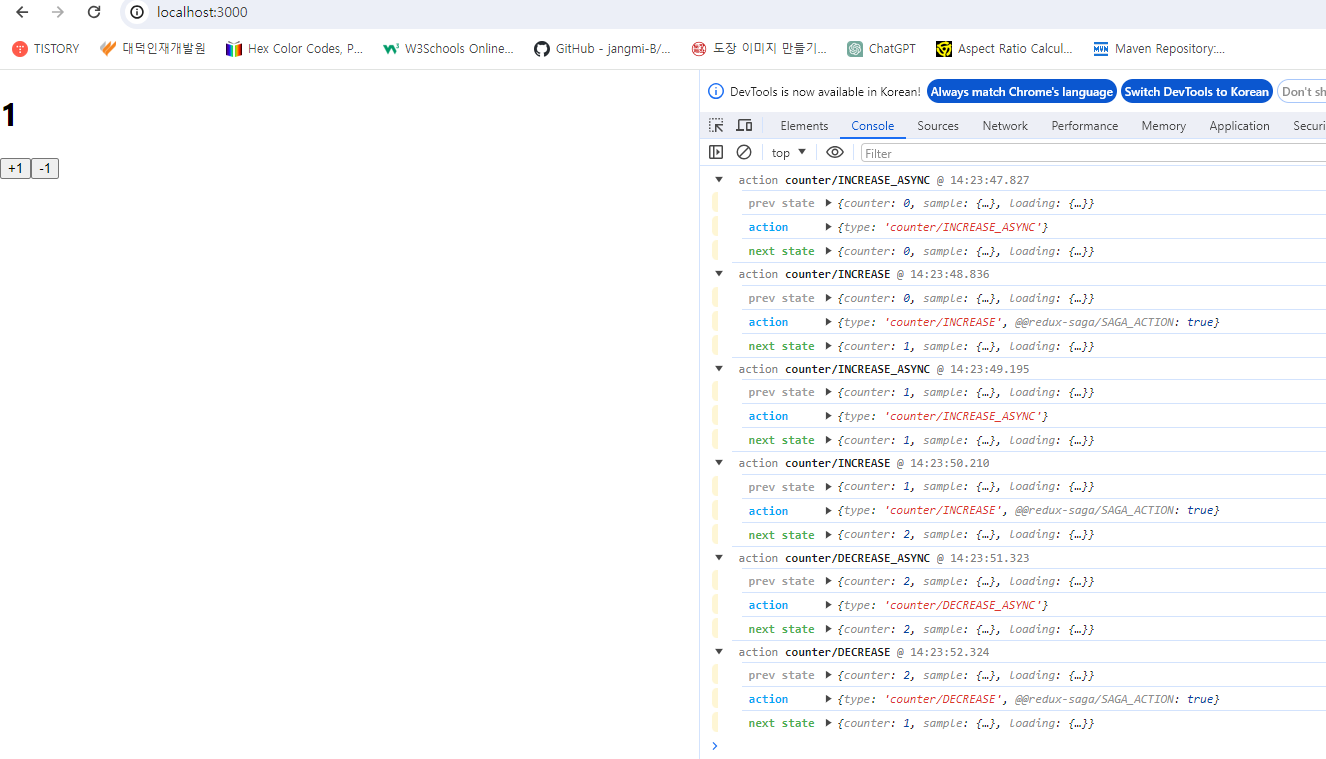
* 여기서 리덕스 개발자 도구를 적용하여 어떤 액션이 디스패치되고 있는지 더 편하게 확인하겠다.
* 먼저 리덕스 개발자 도구 라이브러리를 설치하자.
$ yarn add redux-devtools-extension* 이 라이브러리의 composeWithDevtools 함수를 리덕스 미들웨어와 함께 사용할 때는 그냥 applyMiddleware 부분을 감싸 주면 된다.
[index.js]
import React from "react";
import ReactDOM from "react-dom/client";
import "./index.css";
import App from "./App";
import reportWebVitals from "./reportWebVitals";
import { applyMiddleware, createStore } from "redux";
import rootReducer, { rootSaga } from "./modules";
import { Provider } from "react-redux";
// import loggerMiddleware from "./lib/loggerMiddleware";
import { createLogger } from "redux-logger";
import { thunk as ReduxThunk } from "redux-thunk"; // Import the 'thunk' function
import createSagaMiddleware from "redux-saga";
import { composeWithDevTools } from "redux-devtools-extension";

const logger = createLogger();
const sagaMiddleware = createSagaMiddleware();
const store = createStore(
  rootReducer,
  composeWithDevTools(applyMiddleware(logger, ReduxThunk, sagaMiddleware))
);

sagaMiddleware.run(rootSaga);

const root = ReactDOM.createRoot(document.getElementById("root"));
root.render(
  <Provider store={store}>
    <App />
  </Provider>
);

reportWebVitals();
* 리덕스 개발자 도구를 적용했다. 이제 리덕스 개발자 도구를 열고 +1 버튼을 빠르게 두 번 눌러 보자.
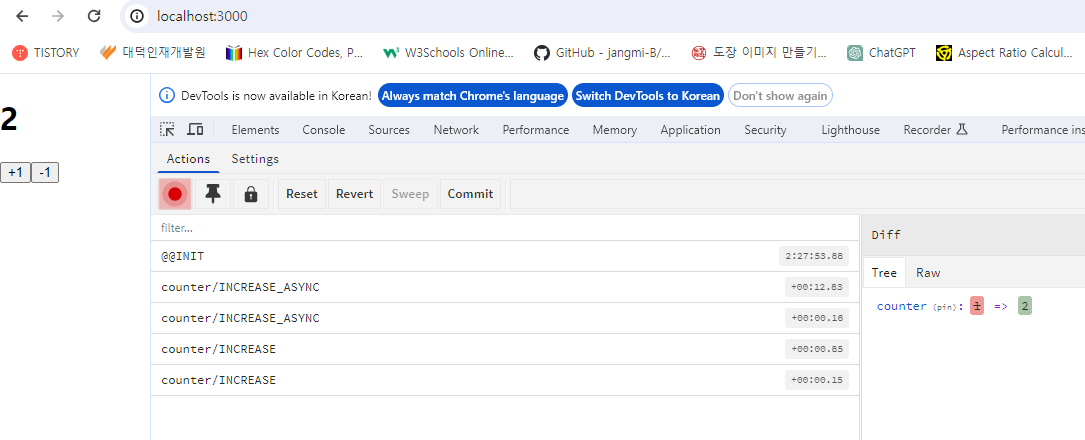
* +1 버튼을 두 번 누르면 INCREMENT_ASYNC 액션이 두 번 디스패치되고, 이에 따라 INCREASE 액션도 두 번 디스패치 한다. takeEvery를 사용하여 increaseSaga를 등록했으므로 디스패치되는 모든 INCREASE_ASYNC 액션에 대해 1초 후 INCREASE 액션을 발생시켜 준다.
* 이번에는 페이지를 새로고침한 뒤에 -1 버튼을 두 번 눌르서 어떤 액션이 디스패치되는지 확인해 보자.
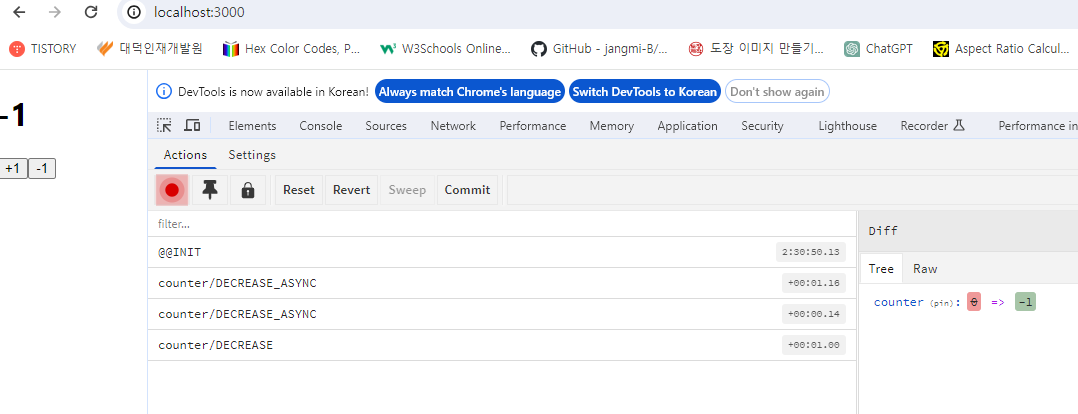
* 조금 전과는 다르게 DECREASE_ASYNC 액션이 두 번 디스패치되었음에도 불구하고 DECREASE 액션은 단 한 번 디스패치되었다. 조금 전에 decreaseSaga를 등록할 때 takeLatest를 사용했기 때문이다. 여러 액션이 중첩되어 디스패치 되었을 때는 기존의 것들은 무시하고 가장 마지막 액션만 제대로 처리한다.
[3] API 요청 상태 관리하기
* 이번에는 redux-saga를 사용하여 API 요청을 해 보자. 기존에 thunk로 관리하던 액션 생성 함수를 없애고, 사가를 사용하여 처리한다.
* sample 리덕스 모듈을 다음과 같이 수정해 보자.
[modules/sample.js]
import { createAction, handleActions } from "redux-actions";
import { call, put, takeLatest } from "redux-saga/effects";
import * as api from "../lib/api";
import { startLoading, finishLoading } from "./loading";

// 액션 타입을 선언한다.

const GET_POST = "sample/GET_POST";
const GET_POST_SUCCESS = "sample/GET_POST_SUCCESS";
const GET_POST_FAILURE = "sample/GET_POST_FAILURE";

const GET_USERS = "sample/GET_USERS";
const GET_USERS_SUCCESS = "sample/GET_USERS_SUCCESS";
const GET_USERS_FAILURE = "sample/GET_USERS_FAILURE";

export const getPost = createAction(GET_POST, (id) => id);
export const getUsers = createAction(GET_USERS);

function* getPostSaga(action) {
  yield put(startLoading(GET_POST)); // 로딩 시작
  // 파라미터로 action을 받아 오면 액션의 정보를 조회할 수 있다.
  try {
    // call을 사용하면 Promise를 반환하는 함수를 호출하고, 기다릴 수 있다.
    // 첫 번째 파라미터는 함수, 나머지 파라미터는 해당 함수에 넣을 인수이다.
    const post = yield call(api.getPost, action.payload); // api.getPost(action.payload)를 의미
    yield put({
      type: GET_POST_SUCCESS,
      payload: post.data,
    });
  } catch (e) {
    // try/catch 문을 사용하여 에러도 잡을 수 있다.
    yield put({
      type: GET_POST_FAILURE,
      payload: e,
      error: true,
    });
  }
  yield put(finishLoading(GET_POST)); // 로딩 완료
}

function* getUsersSaga() {
  yield put(startLoading(GET_USERS));
  try {
    const users = yield call(api.getUsers);
    yield put({
      type: GET_USERS_SUCCESS,
      payload: users.data,
    });
  } catch (e) {
    yield put({
      type: GET_USERS_FAILURE,
      payload: e,
      error: true,
    });
  }
  yield put(finishLoading(GET_USERS));
}

export function* sampleSaga() {
  yield takeLatest(GET_POST, getPostSaga);
  yield takeLatest(GET_USERS, getUsersSaga);
}

// 초기 상태를 선언한다.
// 요청의 로딩 중 상태는 loading이라는 객체에서 관리한다.

const initialState = {
  post: null,
  users: null,
};

const sample = handleActions(
  {
    [GET_POST_SUCCESS]: (state, action) => ({
      ...state,
      post: action.payload,
    }),
    [GET_USERS_SUCCESS]: (state, action) => ({
      ...state,
      users: action.payload,
    }),
  },
  initialState
);

export default sample;
* 여기서 GET_POST 액션의 경우에는 API 요청을 할 때 어떤 id로 조회할지 정해 주어야 한다. redux-saga를 사용할 때는 id처럼 요청에 필요한 값을 액션의 payload로 넣어 주어야 한다. 예를 들어 지금 상황이라면 다음과 같은 액션이 디스패치된다.
{
    type: 'sample/GET_POST',
    payload: 1
}
* 그러면 이 액션을 처리하기 위한 사가를 작성할 때 payload 값을 API를 호출하는 함수의 인수로 넣어 주어야 한다.
* API를 호출해야 하는 상황에서는 사가 내부에서 직접 호출하지 않고 call 함수를 사용한다. call 함수의 경우, 첫 번째 인수는 호출하고 싶은 함수이고, 그 뒤에 오는 인수들은 해당 함수에 넣어 주고 싶은 인수이다. 지금 getPostSaga의 경우에는 id를 의미하는 action.payload 가 인수가 된다.
* 사가를 작성하여 구현하는 과정에서 처음 redux-thunk를 사용했을 때처럼 반복되는 코드가 나왔다. 충분히 간소화할 수 있는 코드들이다. 지금은 일단 기능을 구현하고, 나중에 리팩토링 하겠다.
* 코드를 다 수정했으면 sampleSaga를 루트 사가에 등록하자.
[modules/index.js]
import { combineReducers } from "redux";
import { all } from "redux-saga/effects";
import counter, { counterSaga } from "./counter";
import sample, { sampleSaga } from "./sample";
import loading from "./loading";

const rootReducer = combineReducers({ counter, sample, loading });

export function* rootSaga() {
  // all 함수는 여러 사가를 합쳐 주는 역할을 한다.
  yield all([counterSaga(), sampleSaga()]);
}

export default rootReducer;
* 사가를 등록한 후, App 컴포넌트에서 SampleContainer를 렌더링하자.
[App.js]
import React from "react";
import SampleContainer from "./containers/SampleContainer";
const App = () => {
return (
<div>
<SampleContainer />
</div>
);
};
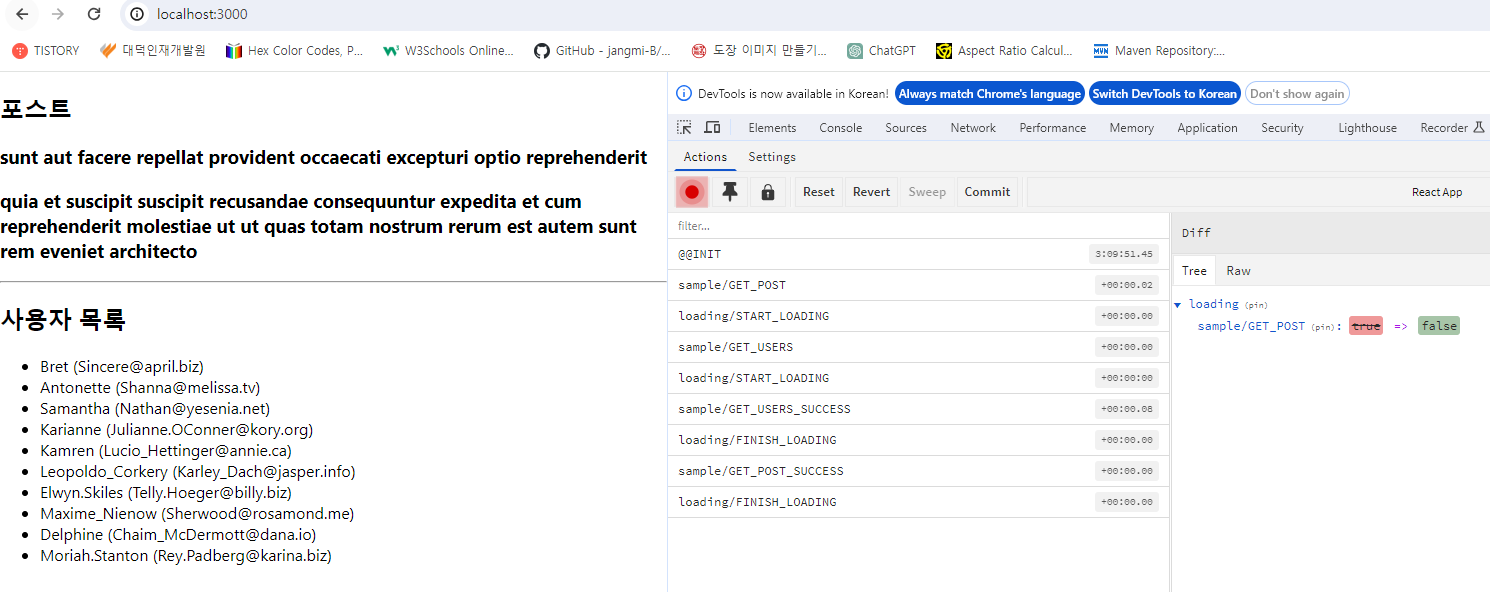
export default App;* 그리고 기능이 잘 작동하는지 확인해 보자.
[4] 리팩토링
* 이제 반복되는 코드를 따로 함수화하여 리팩토링해 보자. 이전에 thunk 함수를 위해 createRequestThunk 라는 함수를 만들었던 것처럼 createRequestSaga 라는 함수를 만들어 보자.
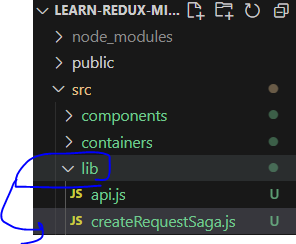
import { call, put } from "redux-saga/effects";
import { startLoading, finishLoading } from "../modules/loading";

export default function createRequestSaga(type, request) {
  const SUCCESS = `${type}_SUCCESS`;
  const FAILURE = `${type}_FAILURE`;

  return function* (action) {
    yield put(startLoading(type)); // 로딩 시작
    try {
      const response = yield call(request, action.payload);
      yield put({
        type: SUCCESS,
        payload: response.data,
      });
    } catch (e) {
      yield put({
        type: FAILURE,
        payload: e,
        error: true,
      });
    }
    yield put(finishLoading(type)); // 로딩 끝;
  };
}
* 이제 기존에 구현했던 사가를 다음과 같이 짧은 코드로 구현할 수 있다.
[modules/sample.js]
import { createAction, handleActions } from "redux-actions";
import { takeLatest } from "redux-saga/effects";
import * as api from "../lib/api";
import createRequestSaga from "../lib/createRequestSaga";

// 액션 타입을 선언한다.

const GET_POST = "sample/GET_POST";
const GET_POST_SUCCESS = "sample/GET_POST_SUCCESS";

const GET_USERS = "sample/GET_USERS";
const GET_USERS_SUCCESS = "sample/GET_USERS_SUCCESS";

export const getPost = createAction(GET_POST, (id) => id);
export const getUsers = createAction(GET_USERS);

const getPostSaga = createRequestSaga(GET_POST, api.getPost);
const getUsersSaga = createRequestSaga(GET_USERS, api.getUsers);

export function* sampleSaga() {
  yield takeLatest(GET_POST, getPostSaga);
  yield takeLatest(GET_USERS, getUsersSaga);
}

// 초기 상태를 선언한다.
// 요청의 로딩 중 상태는 loading이라는 객체에서 관리한다.

const initialState = {
  post: null,
  users: null,
};

const sample = handleActions(
  {
    [GET_POST_SUCCESS]: (state, action) => ({
      ...state,
      post: action.payload,
    }),
    [GET_USERS_SUCCESS]: (state, action) => ({
      ...state,
      users: action.payload,
    }),
  },
  initialState
);

export default sample;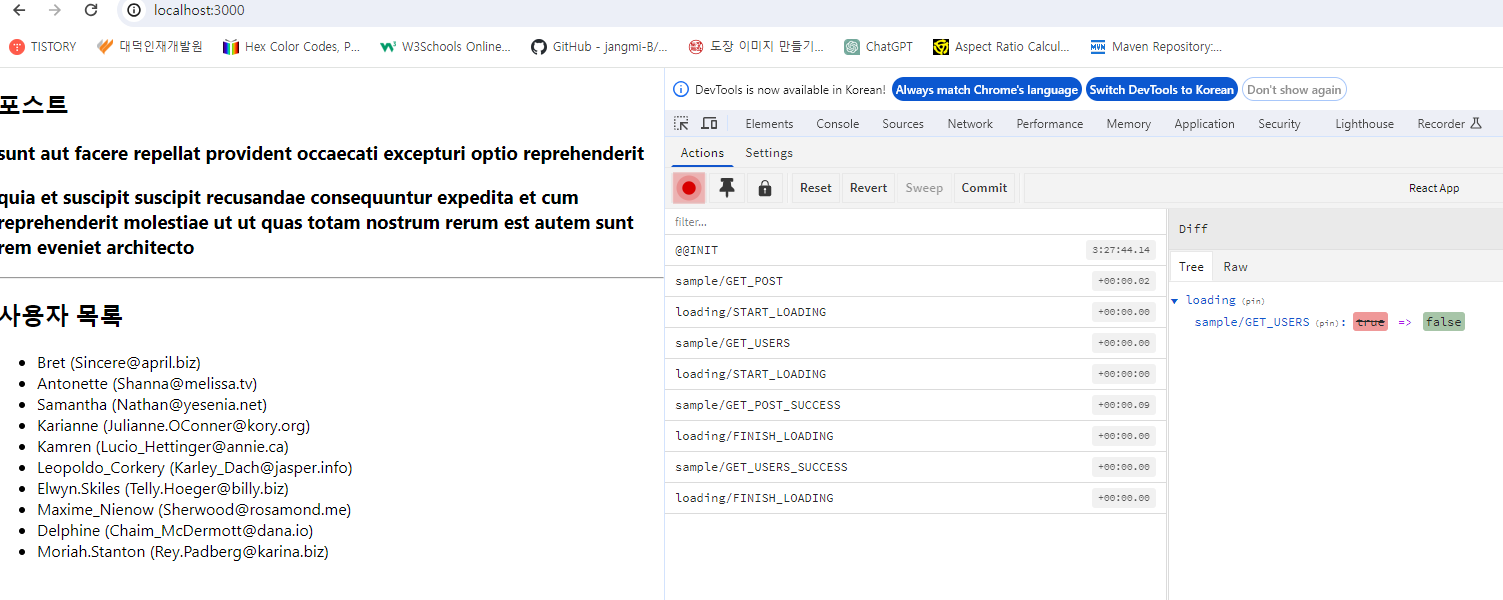
[5] 알아 두면 유용한 기능들
* 이번에는 redux-saga가 제공하는 기능 중에서 알아 두면 유용한 몇 가지 기능을 배워 보겠다. 먼저 사가 내부에서 현재 상태를 조회하는 방법이다.
[modules/counter.js]
...

// 마우스 클릭 이벤트가 payload 안에 들어가지 않도록
// () => undefined를 두 번째 파라미터로 넣어 준다.
export const increaseAsync = createAction(INCREASE_ASYNC, () => undefined);
export const decreaseAsync = createAction(DECREASE_ASYNC, () => undefined);

function* increaseSaga() {
  yield delay(1000); // 1초를 기다린다.
  yield put(increase()); // 특정 액션을 디스패치한다.
  const number = yield select((state) => state.counter); // state는 스토어의 상태를 의미함
  console.log(`현재 값은 ${number} 입니다.`);
}

function* decreaseSaga() {
  yield delay(1000); // 1초를 기다린다.
  yield put(decrease()); // 특정 액션을 디스패치한다.
  const number = yield select((state) => state.counter); // state는 스토어의 상태를 의미함
  console.log(`현재 값은 ${number} 입니다.`);
}

...
* 이제 CounterContainer를 App에서 렌더링하고 +1 버튼을 눌러 보자. 콘솔에 "현재 값은 1입니다." 라는 문구가 잘 나타나는가?
import React from "react";
import SampleContainer from "./containers/SampleContainer";
import CounterContainer from "./containers/CounterContainer";

const App = () => {
  return (
    <div>
      <SampleContainer />
      <br />
      <CounterContainer />
    </div>
  );
};

export default App;
* 만약 사가 내부에서 현재 상태를 참조해야 하는 상황이 생기면 이렇게 select를 사용하면 된다. 다음으로 사가가 실행되는 주기를 제한하는 방법이다. takeEvery 대신 throttle 이라는 함수를 사용하면 사가가 n초에 단 한 번만 호출되도록 설정할 수 있다.
* 예를 들어 counterSaga를 다음과 같이 수정하면 increaseSaga는 3초에 단 한 번만 호출된다.
[containers/SampleContainer.js]
import { createAction, handleActions } from "redux-actions";
import {
  delay,
  put,
  select,
  takeEvery,
  takeLatest,
  throttle,
} from "redux-saga/effects";

(...)

export function* counterSaga() {
  // 첫 번째 파라미터: n초 * 1000
  yield throttle(3000, INCREASE_ASYNC, increaseSaga);

  // takeLatest는 기존에 진행 중이던 작업이 있다면 취소 처리하고
  // 가장 마지막으로 실행된 작업만 수행한다.
  yield takeLatest(DECREASE_ASYNC, decreaseSaga);
}

(...)
* redux-saga는 이 책에서 다룬 기능 외에도 여러 기능을 제공하기 때문에 비동기 작업을 처리하면서 겪을 수 있는 다양한 상황에 맞춰 개발할 수 있다. 조금 복잡한 상황을 접했다면 redux-saga의 메뉴얼을 참고해 보자.
Redux-Saga - An intuitive Redux side effect manager. | Redux-Saga
An open source Redux middleware library for efficiently handling asynchronous side effects
redux-saga.js.org
4. 정리
* 이 장에서는 리덕스 미들웨어를 사용하는 방법을 알아보고, 비동기 작업을 미들웨어로 어떻게 처리할 수 있는지 배웠다. 비동기 작업을 처리할 때 redux-thunk는 일반 함수로 이루어져 있기 때문에 간단명료하다는 장점이 있고, redux-saga는 진입 장벽이 조금 있을 수 있으나 복잡한 상황에서 더욱 효율적으로 작업을 관리할 수 있다는 장점이 있다.
* 앞으로 비동기 작업을 할 때는 이 둘을 사용하거나 혹은 redux-promise-middleware, redux-pender, redux-observable 등 이 책에서 다루지 않는 다른 미들웨어를 시도해 보아도 좋다.
* 아니면 미들웨어를 사용하지 않고 그냥 컴포넌트단에서 API를 요청하는 것도 틀린 방법은 아니다. 비동기 작업을 처리할 때 리덕스 미들웨어를 사용하는 이유는 좀 더 편하게 처리하기 위해서이다. 그러므로 오히려 불편하다고 느낀다면 사용하지 않는 편이 좋을 수도 있다.
'React > React_리액트 심화' 카테고리의 다른 글
| (14) 코드 스플리팅 (0) | 2023.12.14 |
|---|---|
| (12) 리덕스 미들웨어를 통해 비동기 작업 관리 2 (0) | 2023.12.14 |
| (11) 리덕스 미들웨어를 통해 비동기 작업 관리 1 (0) | 2023.12.13 |
| (10) 리덕스를 사용하여 리액트 애플리케이션 상태 관리하기 5 (0) | 2023.12.13 |
| (9) 리덕스를 사용하여 리액트 애플리케이션 상태 관리하기 4 (0) | 2023.12.13 |


