
| 일 | 월 | 화 | 수 | 목 | 금 | 토 |
|---|---|---|---|---|---|---|
| 1 | 2 | 3 | 4 | 5 | 6 | 7 |
| 8 | 9 | 10 | 11 | 12 | 13 | 14 |
| 15 | 16 | 17 | 18 | 19 | 20 | 21 |
| 22 | 23 | 24 | 25 | 26 | 27 | 28 |
- 한국건설관리시스템
- 다형성
- 자동차수리시스템
- abstract
- NestedFor
- 환경설정
- oracle
- 정수형타입
- 대덕인재개발원
- 예외미루기
- 컬렉션 타입
- EnhancedFor
- 컬렉션프레임워크
- 집합_SET
- 객체 비교
- 생성자오버로드
- cursor문
- GRANT VIEW
- 사용자예외클래스생성
- 추상메서드
- 인터페이스
- 자바
- 참조형변수
- exception
- 제네릭
- 예외처리
- 메소드오버로딩
- Java
- 어윈 사용법
- 오라클
- Today
- Total
거니의 velog
(61) AWS Elastic Beanstalk 7 본문
7. API 서버의 S3 설정
* 설정된 S3 서비스를 이용하기 위해서는 API 서버에 라이브러리를 추가하고 설정을 추가해야만 한다. 이 설정에 대한 라이브러리는 Spring Cloud AWS 를 이용한다.
https://github.com/awspring/spring-cloud-aws
GitHub - awspring/spring-cloud-aws: The New Home for Spring Cloud AWS
The New Home for Spring Cloud AWS. Contribute to awspring/spring-cloud-aws development by creating an account on GitHub.
github.com
* 스프링 부트의 버전에 따라 사용할 수 있는 라이브러리 버전이 다르기 때문에 주의해야 한다.


* build.gradle 파일의 라이브러리를 추가한다.

dependencies {
	(...)
	implementation 'io.awspring.cloud:spring-cloud-aws-starter-s3:3.0.2'
}
(1) application.properties 설정
* S3를 이용하기 위해서는 application.properties 파일에 엑세스 키와 비밀 엑세스 키를 지정하고 S3 관련 설정을 추가해야 한다.

# 빈즈톡의 내부 API 포트 설정
server.port=5000

# 스프링 S3 설정
spring.cloud.aws.credentials.access-key=엑세스키
spring.cloud.aws.credentials.secret-key=비밀 엑세스키

spring.cloud.aws.s3.bucket=elasticbeanstalk... 버킷 이름
spring.cloud.aws.region.static=us-east-1
spring.cloud.aws.stack.auto=false
(2) S3 업로드 코드 작성 및 테스트
* S3에 대한 설정이 정상적인지 확인하기 위해서 S3에 업로드를 처리하는 코드를 생성하고, 이를 테스트해 볼 필요가 있다.
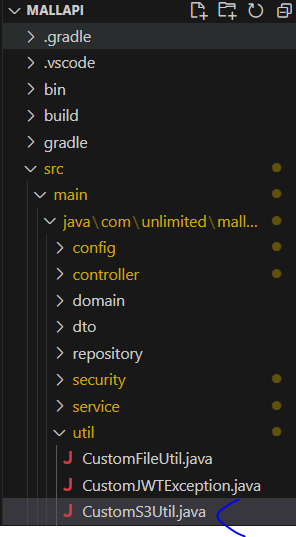
* 프로젝트의 util 패키지 내 CustomS3Util 클래스를 추가한다.
package com.unlimited.mallapi.util;

import java.io.IOException;
import java.nio.file.Files;
import java.nio.file.Path;
import java.util.List;

import org.springframework.beans.factory.annotation.Value;
import org.springframework.stereotype.Component;

import lombok.RequiredArgsConstructor;
import software.amazon.awssdk.services.s3.S3Client;
import software.amazon.awssdk.services.s3.model.DeleteObjectRequest;
import software.amazon.awssdk.services.s3.model.PutObjectRequest;

@Component
@RequiredArgsConstructor
public class CustomS3Util {

    // AWS S3 버킷명을 설정하는 프로퍼티
    @Value("${spring.cloud.aws.s3.bucket}")
    private String bucket;

    // AWS S3 클라이언트를 주입받음
    private final S3Client s3Client;

    /**
     * 주어진 파일 목록을 AWS S3에 업로드합니다.
     *
     * @param filePaths 파일 경로 목록
     * @param delFlag   업로드 후 로컬 파일 삭제 여부
     */
    public void uploadFiles(List<Path> filePaths, boolean delFlag) {
        if (filePaths == null || filePaths.isEmpty()) {
            return;
        }

        // 주어진 파일 목록을 순회하며 AWS S3에 업로드
        for (Path filePath : filePaths) {
            // 업로드 요청 생성
            PutObjectRequest request = PutObjectRequest.builder()
                    .bucket(bucket)
                    .key(filePath.toFile().getName())
                    .build();

            // AWS S3에 파일 업로드
            s3Client.putObject(request, filePath);

            // 업로드 후 로컬 파일 삭제 여부 확인
            if (delFlag) {
                try {
                    // 로컬 파일 삭제
                    Files.delete(filePath);
                } catch (IOException e) {
                    // 파일 삭제 중 예외 발생 시 런타임 예외로 감싸서 전파
                    throw new RuntimeException(e.getMessage());
                }
            }
        }
    }

    /**
     * 주어진 파일 목록을 AWS S3에서 삭제합니다.
     *
     * @param filePaths 파일 경로 목록
     */
    public void deleteFiles(List<Path> filePaths) {
        if (filePaths == null || filePaths.isEmpty()) {
            return;
        }

        // 주어진 파일 목록을 순회하며 AWS S3에서 파일 삭제
        for (Path filePath : filePaths) {
            // 삭제 요청 생성
            DeleteObjectRequest deleteObjectRequest = DeleteObjectRequest.builder()
                    .bucket(bucket)
                    .key(filePath.toFile().getName())
                    .build();

            // AWS S3에서 파일 삭제
            s3Client.deleteObject(deleteObjectRequest);
        }
    }

}
* CustomS3Util 에는 파일들을 업로드 하는 기능과 파일들을 삭제하는 기능을 작성한다. 업로드 시에는 원본 파일이 업로드 후에 삭제될 것인지를 boolean 값으로 추가적으로 지정할 수 있다.
* test 폴더에는 util 패키지를 생성하고 S3UploadTester.java를 추가한다.

package com.unlimited.mallapi.util;

import java.nio.file.Path;
import java.io.File;
import java.util.List;

import org.junit.jupiter.api.Test;
import org.springframework.beans.factory.annotation.Autowired;
import org.springframework.boot.test.context.SpringBootTest;

import lombok.extern.log4j.Log4j2;

@SpringBootTest
@Log4j2
public class S3UploadTests {

    @Autowired
    CustomS3Util s3Util;

    /**
     * AWS S3에 파일 업로드 테스트를 수행하는 JUnit 테스트 메서드입니다.
     */
    @Test
    public void testUpload() {
        // 로그에 업로드 테스트 메시지 출력
        log.info("업로드 테스트 시작...");

        // 테스트할 파일 경로 설정
        String testUploadFilePath = "C:\\Users\\PC_23\\Downloads\\aws.png";
        Path filePath = new File(testUploadFilePath).toPath();

        // 파일 경로를 리스트로 포장
        List<Path> fileList = List.of(filePath);

        // S3에 파일 업로드 (삭제 옵션: false)
        s3Util.uploadFiles(fileList, false);

        // 로그에 업로드 테스트 완료 메시지 출력
        log.info("업로드 테스트 완료.");
    }

}
* testUpload()는 C 드라이브의 다운로드 폴더에서 aws.jpg 파일을 S3로 업로드하는 것이다. 테스트 코드가 정상적으로 실행되면 S3의 버킷에는 aws.jpg 파일이 추가된 것을 확인할 수 있다.


(3) 프로젝트에서 S3 업로드 처리
* 현재 API 서버는 프로젝트가 실행되면 upload 라는 폴더를 이용해서 업로드된 파일을 보관해 왔다. 하지만, S3를 이용하면 최종적으로 파일은 S3의 버킷으로 업로드되도록 하고, 파일의 조회 역시 API 서버를 거치지 않고 S3 버킷에 있는 파일의 링크를 통해서 접근하게 될 것이다.
* 이 과정은 다음과 같은 순서로 처리되어야 한다.
1. 사용자가 업로드한 파일들은 우선 upload 폴더에 저장하고 썸네일을 생성한다.

2. upload 폴더에서 모든 파일의 처리가 끝나면 CustomS3Util 을 이용해서 S3로 업로드 한다.

3. 이 과정에서 S3 에 업로드가 성공하면 upload 폴더에 있는 파일들을 필요하지 않으므로 삭제한다.
* 삭제 역시 S3 버킷에 있는 파일들을 삭제하도록 수정해야 한다.
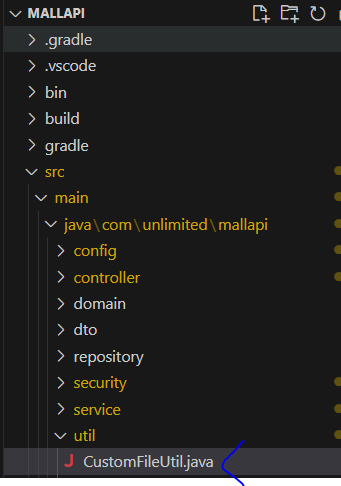
* 기존의 CustomFileUtil의 형태는 그대로 유지하고 내부적으로 CustomS3Util을 이용하도록 코드를 아래와 같이 수정한다.
package com.unlimited.mallapi.util;

import java.io.File;
import java.io.IOException;
import java.nio.file.Files;
import java.nio.file.Path;
import java.nio.file.Paths;
import java.util.ArrayList;
import java.util.List;
import java.util.UUID;

import org.springframework.beans.factory.annotation.Value;
import org.springframework.core.io.FileSystemResource;
import org.springframework.core.io.Resource;
import org.springframework.http.HttpHeaders;
import org.springframework.http.ResponseEntity;
import org.springframework.stereotype.Component;
import org.springframework.web.multipart.MultipartFile;

import jakarta.annotation.PostConstruct;
import lombok.RequiredArgsConstructor;
import lombok.extern.log4j.Log4j2;
import net.coobird.thumbnailator.Thumbnails;

@Component
@Log4j2
@RequiredArgsConstructor
public class CustomFileUtil {

    // 파일 업로드 경로를 설정하는 프로퍼티
    @Value("${com.unlimited.upload.path}")
    private String uploadPath;

    // AWS S3 파일 업로드 유틸리티 클래스 주입
    private final CustomS3Util s3Util;

    // 초기화 메서드
    @PostConstruct
    public void init() {
        // 업로드 경로에 대한 폴더 생성
        File tempFolder = new File(uploadPath);
        if (!tempFolder.exists()) {
            tempFolder.mkdirs();
        }
        uploadPath = tempFolder.getAbsolutePath();
        log.info("---------------------------------------------");
        log.info(uploadPath);
    }

    /**
     * 주어진 MultipartFile 목록을 받아 파일을 저장하고, 저장된 파일명 목록을 반환합니다.
     *
     * @param files 업로드할 파일 목록
     * @return 저장된 파일명 목록
     * @throws RuntimeException 파일 저장 중 예외 발생 시 전파
     */
    public List<String> saveFiles(List<MultipartFile> files) throws RuntimeException {
        if (files == null || files.isEmpty()) {
            return List.of();
        }

        List<String> uploadNames = new ArrayList<>();

        // 주어진 MultipartFile 목록을 순회하며 파일을 저장하고 AWS S3에 업로드
        for (MultipartFile multipartFile : files) {
            // 저장된 파일명 생성 (UUID + 원본 파일명)
            String savedName = UUID.randomUUID().toString() + "_" +
                    multipartFile.getOriginalFilename();
            Path savePath = Paths.get(uploadPath, savedName);
            List<Path> uploadTargetPaths = new ArrayList<>();

            try {
                // 파일 저장
                Files.copy(multipartFile.getInputStream(), savePath);
                uploadTargetPaths.add(savePath);

                // 이미지 파일인 경우 썸네일 생성
                String contentType = multipartFile.getContentType();
                if (contentType != null && contentType.startsWith("image")) {
                    Path thumbnailPath = Paths.get(uploadPath, "s_" + savedName);
                    Thumbnails.of(savePath.toFile())
                            .size(400, 400)
                            .toFile(thumbnailPath.toFile());
                    uploadTargetPaths.add(thumbnailPath);
                }

                // 저장된 파일명 목록에 추가
                uploadNames.add(savedName);

                // AWS S3에 파일 업로드 (삭제 옵션: true)
                s3Util.uploadFiles(uploadTargetPaths, true);
            } catch (IOException e) {
                e.printStackTrace();
                throw new RuntimeException(e.getMessage());
            }
        }

        return uploadNames;
    }

    /**
     * 주어진 파일명을 가지고 해당 파일을 조회하여 ResponseEntity로 반환합니다.
     *
     * @param fileName 조회할 파일명
     * @return ResponseEntity<Resource> 파일 조회 결과
     */
    public ResponseEntity<Resource> getFile(String fileName) {
        Resource resource = new FileSystemResource(uploadPath + File.separator +
                fileName);

        // 파일이 존재하지 않으면 기본 이미지 파일을 사용
        if (!resource.exists()) {
            resource = new FileSystemResource(uploadPath + File.separator +
                    "default.jpeg");
        }

        HttpHeaders headers = new HttpHeaders();
        try {
            // 파일의 Content-Type 설정
            headers.add("Content-Type",
                    Files.probeContentType(resource.getFile().toPath()));
        } catch (Exception e) {
            // Content-Type을 가져오는 중 예외 발생 시 500 Internal Server Error 반환
            return ResponseEntity.internalServerError().build();
        }

        // 파일 조회 결과 반환
        return ResponseEntity.ok().headers(headers).body(resource);
    }

    /**
     * 주어진 파일명 목록을 가지고 파일 및 썸네일을 삭제하고, AWS S3에서도 삭제합니다.
     *
     * @param fileNames 삭제할 파일명 목록
     */
    public void deleteFiles(List<String> fileNames) {
        if (fileNames == null || fileNames.isEmpty()) {
            return;
        }

        List<Path> deleteTargetPaths = new ArrayList<>();

        // 주어진 파일명 목록을 순회하며 파일 및 썸네일을 삭제하고 AWS S3에서도 삭제
        fileNames.forEach(fileName -> {
            // 썸네일 파일명 생성
            String thumbnailFileName = "s_" + fileName;
            Path thumbnailPath = Paths.get(uploadPath, thumbnailFileName);
            Path filePath = Paths.get(uploadPath, fileName);

            try {
                // 파일 및 썸네일 삭제
                Files.deleteIfExists(filePath);
                Files.deleteIfExists(thumbnailPath);

                // 삭제 대상 경로 목록에 추가
                deleteTargetPaths.add(filePath);
                deleteTargetPaths.add(thumbnailPath);

                // AWS S3에서도 삭제
                s3Util.deleteFiles(deleteTargetPaths);
            } catch (IOException e) {
                // 파일 삭제 중 예외 발생 시 런타임 예외로 감싸서 전파
                throw new RuntimeException(e.getMessage());
            }
        });
    }

}
[서버 실행과 결과 확인]
* 현재 엑세스 키와 비밀 엑세스 키는 로컬 환경에 맞는 설정이므로 로컬 환경에서 API 서버를 실행해서 업로드를 확인할 수 있다.
* 리액트 프로젝트는 서버의 주소와 포트를 기록하고 있는 todoApi.js 파일을 수정한다.

import jwtAxios from "../util/jwtUtil";

export const API_SERVER_HOST = "http://localhost:5000";
* 리액트 프로젝트를 실행하고 로그인 및 상품등록을 시도한다.
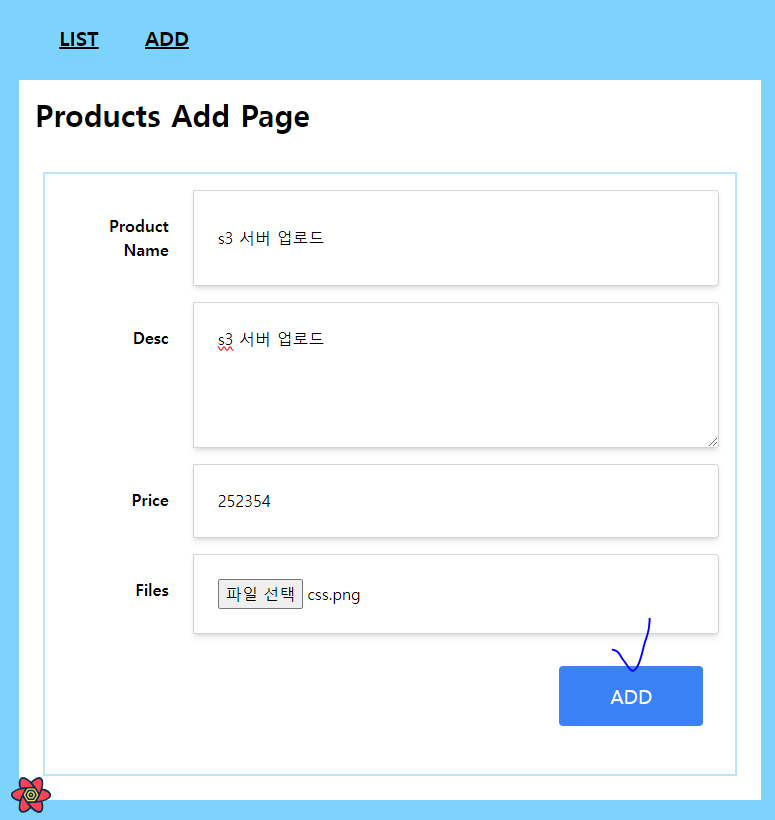
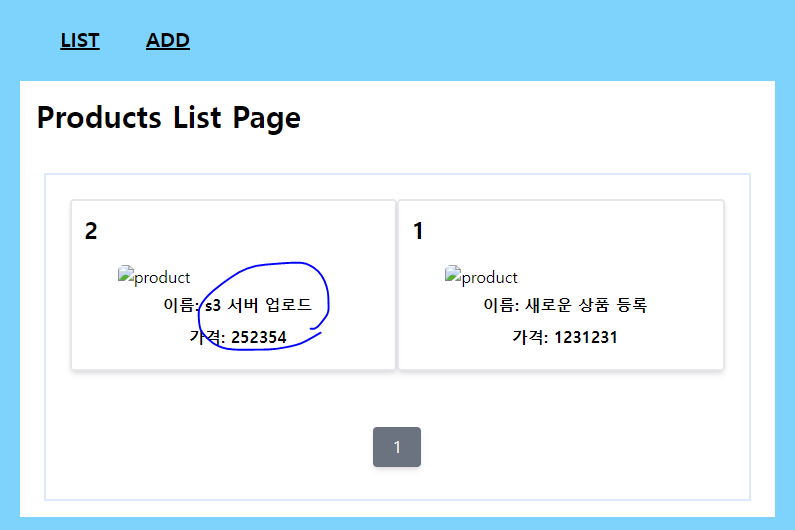
* 상품이 등록된 후에는 화면에서는 아직 이미지를 확인할 수 없지만 S3 버킷에 업로드 된 것을 확인한다.

[리액트에서 이미지 파일 보기]
* 리액트에서 업로드된 파일의 이미지를 보기 위해서는 이미지를 출력하는 링크를 모두 S3 버킷의 주소로 변경해 주어야 한다.
* 주로 상품과 관련된 기능이므로 productApi.js 파일에 S3의 경로를 설정한다.

import { API_SERVER_HOST } from "./todoApi";
import jwtAxios from "../util/jwtUtil";

const host = `${API_SERVER_HOST}/api/products`;

export const s3_host = "https://elasticbeanstalk-us-east-(......).s3.us-east-1.amazonaws.com"; // 버킷 주소 설정

export const postAdd = async (product) => {
	(...)
* 이미지를 출력하는 상품목록, 상품 조회, 상품 수정/삭제 장바구니 아이템 목록 컴포넌트들의 이미지 파일의 경로를 수정한다.
- components/products/ListComponent.js

- components/products/ReadComponent.js

- components/products/ModifyComponent.js

- components/cart/CartItemComponent.js
import { s3_host } from "../../api/productsApi";
<img
alt="product"
className="m-auto rounded-md w-60"
src={`${s3_host}/s_${product.uploadFileNames[0]}`}
/>
혹은
<img
alt="product"
key={i}
className="p-4 w-1/2"
src={`${s3_host}/${imgFile}`}
/>* 이미지 파일들의 링크를 수정하면 브라우저의 개발자 도구를 이용해서 이미지 파일이 S3를 통해서 서비스되는 것을 확인할 수 있다.

(4) 빈즈톡 배포
* 로컬 환경에서 S3의 이용에 문제가 없는 것을 확인했다면 마지막으로 로컬 환경이 아닌 빈즈톡에서 S3를 이용할 수 있는 엑세스 키와 비밀 엑세스 키로 변경해 주어야 한다.
* IAM 서비스의 사용자를 수정해서 새로운 엑세스 키를 생성한다.

* 키를 생성할 때는 AWS 컴퓨팅 서비스에서 실행되는 애플리케이션을 선택한다.

* 생성된 엑세스 키는 application.properties 파일에 적용하고 이전과 같이 bootJar를 실행한 결과를 이용한 압축파일을 생성해서 빈즈톡에 배포한다.

[리액트 API 서버 수정]
* 리액트에서는 todoApi.js 파일에 설정된 API 서버의 경로를 이용하므로 이를 빈즈톡의 주소로 변경한다.
import jwtAxios from "../util/jwtUtil";

export const API_SERVER_HOST =
  "http://apiserver1-env.(...).elasticbeanstalk.com";

const prefix = `${API_SERVER_HOST}/api/todo`;
*API 서버를 종료한 상태에서 리액트를 실행했을 때 빈즈톡 서버를 호출하고 S3를 이용하고 있는 것을 확인한다.

'SpringBoot_React 풀스택 프로젝트' 카테고리의 다른 글
| (62) AWS Elastic Beanstalk 8 (0) | 2024.03.13 |
|---|---|
| (60) AWS Elastic Beanstalk 6 (0) | 2024.03.12 |
| (59) AWS Elastic Beanstalk 5 (0) | 2024.03.12 |
| (58) AWS Elastic Beanstalk 4 (0) | 2024.03.12 |
| (57) AWS Elastic Beanstalk 3 (0) | 2024.03.12 |


