| 일 | 월 | 화 | 수 | 목 | 금 | 토 |
|---|---|---|---|---|---|---|
| 1 | 2 | 3 | 4 | 5 | 6 | 7 |
| 8 | 9 | 10 | 11 | 12 | 13 | 14 |
| 15 | 16 | 17 | 18 | 19 | 20 | 21 |
| 22 | 23 | 24 | 25 | 26 | 27 | 28 |
- 객체 비교
- NestedFor
- 어윈 사용법
- 자동차수리시스템
- 컬렉션프레임워크
- cursor문
- 생성자오버로드
- 정수형타입
- 사용자예외클래스생성
- GRANT VIEW
- 메소드오버로딩
- 컬렉션 타입
- 환경설정
- 추상메서드
- 제네릭
- abstract
- oracle
- 한국건설관리시스템
- 대덕인재개발원
- 예외미루기
- EnhancedFor
- 참조형변수
- 오라클
- 다형성
- 집합_SET
- 인터페이스
- 자바
- 예외처리
- Java
- exception
- Today
- Total
거니의 velog
(19) JSP 페이지를 풍부하게 하는 오픈 소스 기능 본문
1. JSP에서 파일 업로드
* 지금까지 JSP와 직접 관련 있는 기능들에 대해 알아보았다. 이번에는 오픈 소스 라이브러리로 제공되는 기능을 알아볼 것이다. JSP는 대부분의 기능을 오픈 소스로 제공한다. 대표적인 기능이 파일 업로드와 파일 다운로드 기능이며, 이 외에도 이메일 등 수많은 오픈 소스 라이브러리를 제공하고 있다. 먼저 파일 업로드 기능부터 알아보자.
(1) 파일 업로드 라이브러리 설치
* 파일 업로드 기능을 사용하려면 오픈 소스 라이브러리를 설치해야 한다. 파일 업로드 라이브러리를 설치하는 과정은 다음과 같다.
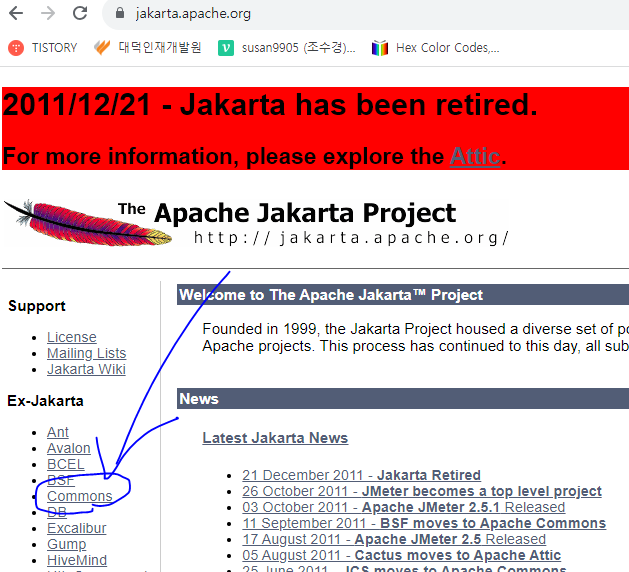
1. jakarta.apache.org 로 접속한 후 왼쪽 메뉴에서 Commons 를 클릭한다.

2. 페이지 왼쪽 중간쯤에 위치한 FileUpload를 클릭한다.

3. FileUpload 1.3.3 버전을 찾아서 here를 클릭한다.

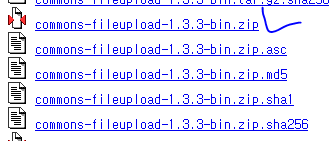
4. commons-fileupload-1.3.3-bin.zip을 클릭해 다운로드한다.

5. zip 파일의 압축을 푼다.
6. 압축을 푼 폴더의 하위 폴더인 commons-fileupload-1.3.3-bin에 위치한 commons-fileupload-1.3.3.jar 파일을 복사한다.

7. 프로젝트 pro15의 WEB-INF 하위에 있는 lib 폴더에 붙여 넣는다.

(2) commons-io-2.6.jar 파일 설치
1. 다음 링크로 접속한 후 commons-io-2.6-bin.zip을 클릭해 다운로드한다.
- https://commons.apache.org/proper/commons-io/download_io.cgi
Commons IO – Download Apache Commons IO
Download Apache Commons IO Using a Mirror We recommend you use a mirror to download our release builds, but you must verify the integrity of the downloaded files using signatures downloaded from our main distribution directories. Recent releases (48 hours)
commons.apache.org

2. 로컬 PC에 원하는 폴더에 zip 파일의 압축을 푼다.
3. commons-io-2.6-bin 폴더에 이동한 후 commons-io-2.6.jar 파일을 복사에 이클립스 프로젝트의 WEB-INF/lib 폴더에 붙여 넣는다.


(3) 파일 업로드 관련 API
* 파일 업로드 라이브러리에서 제공하는 클래스에는 DiskFileItemFactory, ServletFileUpload가 있다. 각 클래스에서 제공하는 기능을 다음 표로 정리해 두었으니 참고하자.
<DiskFileItemFactory 클래스가 제공하는 메서드>
| 메서드 | 기능 |
| setRepository() | 파일을 저장할 디렉터리를 설정한다. |
| setSizeThreadhold() | 최대 업로드 가능한 파일 크기를 설정한다. |
<ServletFileUpload 클래스가 제공하는 메서드>
| 메서드 | 기능 |
| parseRequest() | 전송된 매개변수를 List 객체로 얻는다. |
| getItemIterator() | 전송된 매개변수를 Iterator 타입으로 얻는다. |
(4) JSP 페이지에서 파일 업로드
* 이제 설치한 라이브러리를 이용해 파일을 업로드해 보자.
1. sec01.ex01 패키지를 만들고 FileUplaod 클래스를 생성한다. 또 test01 폴더를 생성하고 실습 파일 uploadForm.jsp를 추가한다.

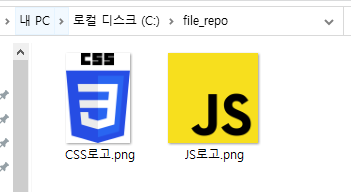
2. 파일을 업로드할 때 사용할 저장소를 다음과 같이 C드라이브 아래에 만든다. 여기서는 폴더 이름을 file_repo로 하였다.

3. uploadForm.jsp를 다음과 같이 작성한다. 파일 업로드창에서 파일을 업로드할 때 <form> 태그의 encType 속성은 반드시 multipart/form-data로 지정해야 한다.
<%@ page language="java" contentType="text/html; charset=UTF-8"
    pageEncoding="UTF-8"
    isELIgnored="false" %>
<%@ taglib prefix="fmt" uri="http://java.sun.com/jsp/jstl/fmt" %>
<%@ taglib prefix="c" uri="http://java.sun.com/jsp/jstl/core" %>

<c:set var="contextPath" value="${pageContext.request.contextPath}" />

<%
	request.setCharacterEncoding("UTF-8");
%>
<html lang="ko">

    <head>
        <meta charset="UTF-8">

        <head>
            <title>파일 업로드창</title>
        </head>

    <body>
    	<!-- 서블릿에 요청해 파일을 업로드 한다. 이 때 반드시 enctype="multipart/form-data"로 설정해야 한다. -->
        <form action="${contextPath}/upload.do" method="post" enctype="multipart/form-data">
            파일1: <input type="file" name="file1"><br>
            파일2: <input type="file" name="file2"> <br>
            파라미터1: <input type="text" name="param1"> <br>
            파라미터2: <input type="text" name="param2"> <br>
            파라미터3: <input type="text" name="param3"> <br>
            <input type="submit" value="업로드">
        </form>
    </body>

</html>
4. 파일 업로드를 처리하는 서블릿인 FileUpload 클래스를 다음과 같이 작성한다. 라이브러리에서 제공하는 DiskFileItemFactory 클래스를 이용해 저장 위치와 업로드 가능한 최대 파일 크기를 설정한다. 그리고 ServletFileUpload 클래스를 이용해 파일 업로드창에서 업로드된 파일과 매개변수에 대한 정보를 가져와 파일을 업로드하고 매개변수 값을 출력한다.
package sec01.ex01;

import java.io.File;
import java.io.IOException;
import java.util.List;

import javax.servlet.ServletException;
import javax.servlet.annotation.WebServlet;
import javax.servlet.http.HttpServlet;
import javax.servlet.http.HttpServletRequest;
import javax.servlet.http.HttpServletResponse;

import org.apache.commons.fileupload.FileItem;
import org.apache.commons.fileupload.FileUploadException;
import org.apache.commons.fileupload.disk.DiskFileItemFactory;
import org.apache.commons.fileupload.servlet.ServletFileUpload;


@WebServlet("/upload.do")
public class FileUpload extends HttpServlet {
	private static final long serialVersionUID = 1L;

	protected void doGet(HttpServletRequest request, HttpServletResponse response)
			throws ServletException, IOException {
		doHandle(request, response);
	}

	protected void doPost(HttpServletRequest request, HttpServletResponse response)
			throws ServletException, IOException {
		doHandle(request, response);
	}

	private void doHandle(HttpServletRequest request, HttpServletResponse response)	throws ServletException, IOException {
		request.setCharacterEncoding("utf-8");
		String encoding = "utf-8";
		File currentDirPath = new File("C:\\file_repo"); // 업로드할 파일 경로를 지정한다.
		DiskFileItemFactory factory = new DiskFileItemFactory();
		factory.setRepository(currentDirPath); // 파일 경로를 설정한다.
		factory.setSizeThreshold(1024 * 1024); // 최대 업로드 가능한 파일 크기를 설정한다.

		ServletFileUpload upload = new ServletFileUpload(factory);
		try {
			List items = upload.parseRequest(request); // request 객체에서 매개변수를 List로 가져온다.
			for (int i = 0; i < items.size(); i++) {
				FileItem fileItem = (FileItem) items.get(i); // 파일 업로드창에서 업로드된 항목들을 하나씩 가져온다.

				if (fileItem.isFormField()) {
					System.out.println(fileItem.getFieldName() + "=" + fileItem.getString(encoding)); // 폼 필드이면 전송된 매개변수 값을 출력한다.
				} else {
					System.out.println("파라미터명:" + fileItem.getFieldName());
					System.out.println("파일명:" + fileItem.getName());
					System.out.println("파일크기:" + fileItem.getSize() + "bytes");

					if (fileItem.getSize() > 0) {
						int idx = fileItem.getName().lastIndexOf("\\");
						if (idx == -1) {
							idx = fileItem.getName().lastIndexOf("/");
						}
						String fileName = fileItem.getName().substring(idx + 1);
						File uploadFile = new File(currentDirPath + "\\" + fileName); // 업로드한 파일 이름을 가져온다.
						fileItem.write(uploadFile); // 업로드한 파일 이름으로 저장소에 파일을 업로드한다.
					} // end if ==> 폼 필드가 아니면 파일 업로드 기능을 수행한다.
				} // end if
			} // end for
		} catch (Exception e) {
			e.printStackTrace();
		}
	}

}
5. 다음의 주소로 요청하여 파일 업로드창을 연다. 그런 다음 이미지 파일을 첨부하고 해당하는 텍스트 필드 값을 입력한 후 업로드를 클릭한다.
- http://localhost:8090/pro15/test01/uploadForm.jsp

6. 2번 과정에서 만든 파일 저장소(C:\file_repo)에 가면 업로드된 파일들을 볼 수 있다.

7. 또한 이클립스의 Console 탭을 보면 업로드한 매개변수 정보와 파일 정보가 출력된 것을 확인할 수 있다.

2. JSP에서 파일 다운로드
* 파일 업로드를 구현했으니 이번에는 서블릿 기능을 이용해 업로드한 파일을 다운로드하여 출력하는 예제를 실습해 보자.
1. 다음과 같이 sec01.ex02 패키지를 만들고 FileDownload 서블릿을 생성한다. 이어서 test02 폴더를 만들고 실습 파일 first.jsp 와 result.jsp 를 추가한다.

2. 첫 번째 JSP에서 다운로드할 이미지 파일 이름을 두 번째 JSP로 전달하도록 first.jsp를 작성한다.
<%@ page language="java" contentType="text/html; charset=UTF-8"
    pageEncoding="UTF-8"
    isELIgnored="false"%>
<%@ taglib prefix="c" uri="http://java.sun.com/jsp/jstl/core"  %>

<%
	request.setCharacterEncoding("utf-8");
%>
<html lang="ko">

    <head>
        <meta charset="UTF-8">
        <title>파일 다운로드 요청하기</title>
    </head>

    <body>
		<!-- 다운로드할 파일 이름을 매개변수로 전달한다. 다른 파일을 업로드했다면 해당 파일 이름으로 수정해야 한다. -->
        <form method="post" action="result.jsp">
            <input type=hidden name="param1" value="css_logo.png" /> <br>
            <input type=hidden name="param2" value="js_logo.png" /> <br>
            <input type="submit" value="이미지 다운로드">
        </form>
    </body>

</html>
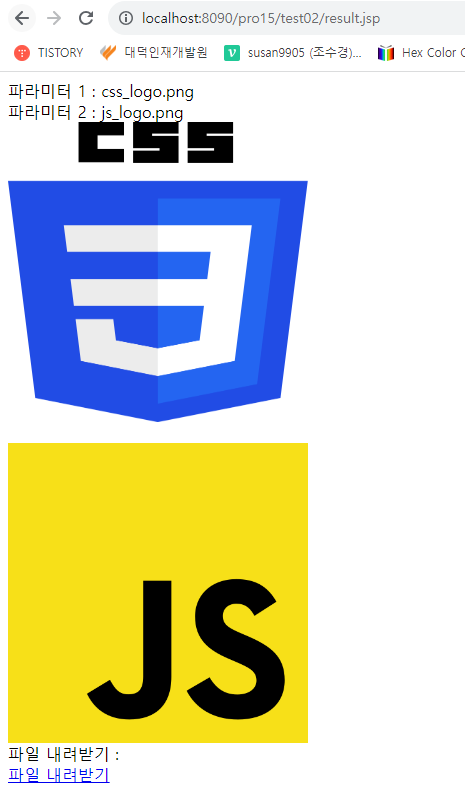
3. 두 번째 JSP인 result.jsp를 다음과 같이 작성한다. 이미지 파일 표시창에서 <img> 태그의 src 속성에 다운로드를 요청할 서블릿 이름 download.do 와 파일 이름을 GET 방식으로 전달한다. 다운로드한 이미지 파일을 바로 <img> 태그에 표시하고, <a> 태그를 클릭해 서블릿에 다운로드를 요청하면 파일 전체를 로컬 PC에 다운로드한다.
<%@ page language="java" contentType="text/html; charset=UTF-8"
    pageEncoding="UTF-8"
    isELIgnored="false"%>
<%@ taglib prefix="c" uri="http://java.sun.com/jsp/jstl/core"  %>
<c:set var="contextPath" value="${pageContext.request.contextPath}" />

<%
	request.setCharacterEncoding("utf-8");
	// 파일 이름으로 서블릿에서 이미지를 다운로드해 표시한다.
	// 이미지를 파일로 다운로드한다.
%>
<html lang="ko">

    <head>
        <meta charset="UTF-8">
        <c:set var="file1" value="${param.param1}" />
        <c:set var="file2" value="${param.param2}" />

        <title>이미지 파일 출력하기</title>
    </head>

    <body>

        파라미터 1 :
        <c:out value="${file1}" /><br>
        파라미터 2 :
        <c:out value="${file2}" /><br>

        <c:if test="${not empty file1 }">
            <img src="${contextPath}/download.do?fileName=${file1}" width=300 height=300 /><br>
        </c:if>
        <br>
        <c:if test="${not empty file2 }">
            <img src="${contextPath}/download.do?fileName=${file2}" width=300 height=300 /><br>
        </c:if>
        파일 내려받기 :<br>
        <a href="${contextPath}/download.do?fileName=${file2}">파일 내려받기</a><br>
    </body>

</html>
4. 파일 다운로드 기능을 할 서블릿인 FileDownload 클래스를 다음과 같이 작성한다. 파일 다운로드 기능은 자바 IO를 이용해 구현한다. 먼저 response.getOutputStream(); 을 호출해 OutputStream을 가져온다. 그리고 배열로 버퍼를 만든 후 while 반복문을 이용해 파일에서 데이터를 한 번에 8KB씩 버퍼에 읽어온다. 이어서 OutputStream의 write() 메서드를 이용해 다시 브라우저로 출력한다.
package sec01.ex02;

import java.io.File;
import java.io.FileInputStream;
import java.io.IOException;
import java.io.OutputStream;

import javax.servlet.ServletException;
import javax.servlet.annotation.WebServlet;
import javax.servlet.http.HttpServlet;
import javax.servlet.http.HttpServletRequest;
import javax.servlet.http.HttpServletResponse;


@WebServlet("/download.do")
public class FileDownload extends HttpServlet {
	private static final long serialVersionUID = 1L;

	protected void doGet(HttpServletRequest request, HttpServletResponse response) throws ServletException, IOException {
		doHandle(request, response);
	}

	protected void doPost(HttpServletRequest request, HttpServletResponse response)	throws ServletException, IOException {
		doHandle(request, response);
	}

	private void doHandle(HttpServletRequest request, HttpServletResponse response) throws ServletException, IOException {
		request.setCharacterEncoding("utf-8");
		response.setContentType("text/html; charset=utf-8");
		String file_repo = "C:\\file_repo";
		String fileName = (String) request.getParameter("fileName"); // 매개변수로 전송된 파일 이름을 읽어온다.
		System.out.println("fileName=" + fileName);
		OutputStream out = response.getOutputStream(); // response에서 OutputStream 객체를 가져온다.
		String downFile = file_repo + "\\" + fileName;
		File f = new File(downFile);
		response.setHeader("Cache-Control", "no-cache");
		response.addHeader("Content-disposition", "attachment; fileName=" + fileName); // 파일을 다운로드할 수 있다.
		FileInputStream in = new FileInputStream(f);
		byte[] buffer = new byte[1024 * 8];
		while (true) {
			int count = in.read(buffer);
			if (count == -1)
				break;
			out.write(buffer, 0, count);
		} // 버퍼 기능을 이용해 파일에서 버퍼로 데이터를 읽어와 한꺼번에 출력한다.
		in.close();
		out.close();
	}

}
5. 다음의 주소로 요청한 후 이미지 다운로드를 클릭한다.
- http://localhost:8090/pro15/test02/first.jsp

6. 업로드한 이미지가 브라우저에 출력되면 파일 내려받기를 클릭해 로컬 PC에 파일을 저장한다.


* JSP는 수많은 오픈 소스 라이브러리를 제공한다. 여기서 다루지 않은 그 외의 라이브러리들은 나중에 스프링 프레임워크를 배울 때 상세히 알아보자.
* 이번에는 JSP의 화면을 구현하는 요소들의 추가된 기능(HTML 태그나 자바스크립트에 많은 변화가 있었다)에 대해 좀 더 알아보자.
'Java > Java_JSP' 카테고리의 다른 글
| (18) 표현 언어와 JSTL 9 (0) | 2023.09.20 |
|---|---|
| (17) 표현 언어와 JSTL 8 (0) | 2023.09.20 |
| (16) 표현 언어와 JSTL 7 (0) | 2023.09.18 |
| (15) 표현 언어와 JSTL 6 (0) | 2023.09.15 |
| (14) 표현 언어와 JSTL 5 (0) | 2023.09.15 |


