
| 일 | 월 | 화 | 수 | 목 | 금 | 토 |
|---|---|---|---|---|---|---|
| 1 | 2 | 3 | 4 | 5 | 6 | 7 |
| 8 | 9 | 10 | 11 | 12 | 13 | 14 |
| 15 | 16 | 17 | 18 | 19 | 20 | 21 |
| 22 | 23 | 24 | 25 | 26 | 27 | 28 |
- 한국건설관리시스템
- 예외미루기
- 자바
- cursor문
- 집합_SET
- 예외처리
- 자동차수리시스템
- 오라클
- 인터페이스
- exception
- 환경설정
- oracle
- 대덕인재개발원
- 어윈 사용법
- Java
- 사용자예외클래스생성
- 컬렉션프레임워크
- 정수형타입
- 참조형변수
- 메소드오버로딩
- 컬렉션 타입
- 생성자오버로드
- GRANT VIEW
- abstract
- EnhancedFor
- 다형성
- 제네릭
- 추상메서드
- 객체 비교
- NestedFor
- Today
- Total
거니의 velog
(19) HTML 과 JavaScript 연동하기 1 본문
* HTML 을 사용하면 브라우저에서 우리가 보여주고 싶은 UI (유저 인터페이스) 를 보여줄 수 있다. 만약에 사용자의 인터랙션 (상호작용) 에 따라 동적으로 UI 를 업데이트하고 싶다면, JavaScript 를 연동해주어야 한다.
* 보통 인터랙션이 많은 경우에는 Vanilla JavaScript (별도의 라이브러리/프레임워크를 사용하지 않는 형태) 를 사용해서 하기에는 코드의 양도 많아지고 코드 관리도 어려운 편이라 보통 React, Vue, Angular 등의 도구를 사용한다.
* 그래도, 해당 도구 없이 하는 기본적인 방법 또한 이해를 해둬야 앞으로 라이브러리/프레임워크를 공부하게 될 때 이해에 도움을 주므로, 간단한 예제 몇가지를 함께 만들어보자.
1. 카운터
* 첫번째로 만들어볼것은, 버튼을 클릭하면 숫자가 올라가거나 내려가는 카운터이다. CodeSandbox 에서 새로운 Vanilla 샌드박스를 만들고, index.js 파일 내용은 비우고, index.html 을 다음과 같이 수정해보자.
(1) UI 만들기
<!DOCTYPE html>
<html>
  <head>
    <title>Parcel Sandbox</title>
    <meta charset="UTF-8" />
  </head>

  <body>
    <h2 id="number">0</h2>
    <div>
      <button id="increase">+1</button>
      <button id="decrease">-1</button>
    </div>

    <script src="src/index.js"></script>
  </body>
</html>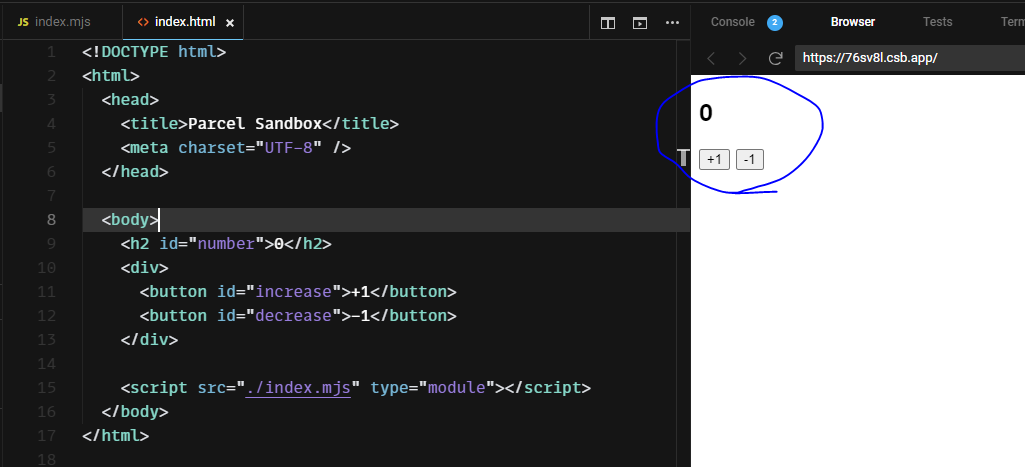
* 위와 같은 결과물이 나타났는가? 우리가 보여준 h2 와 button 태그에 id 값을 설정해주었는데, 이렇게 id 값을 설정해주면 JavaScript 에서 쉽게 해당 DOM 을 선택 할 수 있다. 여기서 DOM 이란, 각 태그에 대한 정보를 지니고 있는 JavaScript 객체이다.
(2) DOM 선택하기
* 우선, DOM을 선택해보자. index.js 를 다음과 같이 수정해보자.
const number = document.getElementById("number");
const increase = document.getElementById("increase");
const decrease = document.getElementById("decrease");

console.log(number);
console.log(increase);
console.log(decrease);
* 각 DOM 에 내장되어있는 기능들은 정말 다양하지만 그 중에서 중요한것 몇가지만 사용해보자.
https://developer.mozilla.org/en-US/docs/Web/API/Element
Element - Web APIs | MDN
Element is the most general base class from which all element objects (i.e. objects that represent elements) in a Document inherit. It only has methods and properties common to all kinds of elements. More specific classes inherit from Element.
developer.mozilla.org
const number = document.getElementById("number");
const increase = document.getElementById("increase");
const decrease = document.getElementById("decrease");

console.log(number.innerText); // 내용
console.log(increase.offsetTop); // top 위치
console.log(decrease.id); // id
(3) 이벤트 설정하기
* 이제 DOM 이벤트를 설정해보자. 버튼들이 클릭 됐을 때 콘솔에 텍스트를 출력하는 이벤트를 설정해보자.
const number = document.getElementById("number");
const increase = document.getElementById("increase");
const decrease = document.getElementById("decrease");

increase.onclick = () => {
  console.log("increase 가 클릭됨");
};

decrease.onclick = () => {
  console.log("decrease 가 클릭됨");
};
* 버튼들을 클릭했을 때 콘솔에 우리가 설정한 텍스트들이 출력되는지 확인해보자.
* DOM 에 이벤트를 설정 할 때에는 on이벤트이름 값에 함수를 설정해주면 된다. DOM 이벤트의 종류는 정말 다양하다.
https://developer.mozilla.org/en-US/docs/Web/Events
Event reference | MDN
Events are fired to notify code of "interesting changes" that may affect code execution. These can arise from user interactions such as using a mouse or resizing a window, changes in the state of the underlying environment (e.g. low battery or media events
developer.mozilla.org
* 그럼 이제, 버튼들이 클릭될 때 숫자값을 올리거나 내려보자.
const number = document.getElementById("number");
const increase = document.getElementById("increase");
const decrease = document.getElementById("decrease");

increase.onclick = () => {
  const current = parseInt(number.innerText, 10);
  number.innerText = current + 1;
};

decrease.onclick = () => {
  const current = parseInt(number.innerText, 10);
  number.innerText = current - 1;
};
* parseInt 는 문자열을 숫자로 변환해주는 함수이다. 두번째 10을 넣어준 것은, 10진수로 숫자를 받아오겠다는 의미이다.

* 잘 작동하는지 확인해 보자.
'JS_Modern JS(ES6 이후)' 카테고리의 다른 글
| (20) HTML 과 JavaScript 연동하기 2 (0) | 2023.11.06 |
|---|---|
| (18) 자바스크립트에서 비동기 처리 다루기 3 (0) | 2023.11.06 |
| (17) 자바스크립트에서 비동기 처리 다루기 2 (0) | 2023.11.06 |
| (16) 자바스크립트에서 비동기 처리 다루기 1 (0) | 2023.11.06 |
| (15) 알고 있으면 유용한 자바스크립트 문법 5 (0) | 2023.11.06 |


