
| 일 | 월 | 화 | 수 | 목 | 금 | 토 |
|---|---|---|---|---|---|---|
| 1 | 2 | 3 | 4 | 5 | 6 | 7 |
| 8 | 9 | 10 | 11 | 12 | 13 | 14 |
| 15 | 16 | 17 | 18 | 19 | 20 | 21 |
| 22 | 23 | 24 | 25 | 26 | 27 | 28 |
| 29 | 30 | 31 |
- GRANT VIEW
- abstract
- cursor문
- EnhancedFor
- 사용자예외클래스생성
- 예외처리
- 대덕인재개발원
- 자동차수리시스템
- exception
- 메소드오버로딩
- 참조형변수
- 오라클
- 한국건설관리시스템
- oracle
- 다형성
- 예외미루기
- 어윈 사용법
- 환경설정
- NestedFor
- 컬렉션프레임워크
- 자바
- 컬렉션 타입
- 정수형타입
- 제네릭
- 생성자오버로드
- 인터페이스
- 추상메서드
- Java
- 객체 비교
- 집합_SET
- Today
- Total
거니의 velog
(15) mongoose를 이용한 MongoDB 연동 실습 4 본문
4. esm으로 ES 모듈 import/export 문법 사용하기
* 기존 리액트 프로젝트에서 사용해 오던 ES 모듈 import/export 문법은 Node.js에서 아직 정식으로 지원되지 않는다. Node.js에 해당 기능이 구현되어 있기는 하지만 아직 실험적인 단계이기 때문에 기본 옵션으로는 사용할 수 없으며, 확장자를 .mjs로 사용하고 node를 실행할 때 --experimental-modules 라는 옵션을 넣어 주어야 한다.
* Node.js에서 import/export 문법을 꼭 사용해야 할 필요는 없지만, 이 문법을 사용하면 VS Code에서 자동 완성을 통해 모듈을 자동으로 쉽게 불러올 수 있고 코드도 더욱 깔끔해진다. 그래서 우리는 esm이라는 라이브러리의 도움을 받아 해당 문법을 사용해 볼 것이다.
* 먼저 esm을 yarn으로 설치해 주자.
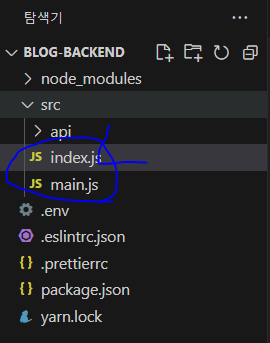
$ yarn add esm* 그리고 기존 src/index.js 파일의 이름을 main.js로 변경하고, index.js 파일을 새로 생성해서 다음 코드를 작성하자.
// 이 파일에서만 no-global-assign ESLint 옵션을 비활성화합니다
/* eslint-disable no-global-assign */

require = require('esm')(module /*, options*/);
module.exports = require('./main.js');
* 다음으로 package.json 에서 만들었던 스크립트를 조금 수정해 주자.
{
  "name": "blog-backend",
  "version": "1.0.0",
  "main": "index.js",
  "license": "MIT",
  "dependencies": {
    "dotenv": "^16.4.5",
    "eslint-config-prettier": "^9.1.0",
    "esm": "^3.2.25",
    "koa": "^2.15.0",
    "koa-bodyparser": "^4.4.1",
    "koa-router": "^12.0.1",
    "mongoose": "^8.1.3"
  },
  "devDependencies": {
    "eslint": "^8.56.0",
    "nodemon": "^3.0.3"
  },
  "scripts": {
    "start": "node -r esm src",
    "start:dev": "nodemon --watch src/ -r esm src/index.js"
  }
}
* ESLint에서 import/export 구문을 사용해도 오류로 간주하지 않도록 다음과 같이 .eslintrc.json 에서 sourceType 값을 "module"로 설정해 주자.
{
    "env": {
        "browser": true,
        "commonjs": true,
        "es2021": true,
        "node": true
    },
    "extends": ["eslint:recommended", "prettier"],
    "parserOptions": {
        "ecmaVersion": "latest",
        "sourceType": "module"
    },
    "rules": {
        "no-unused-vars": "warn",
        "no-console": "off"
    }
}
* 이제 프로젝트에서 import/export 구문을 자유롭게 사용할 수 있다! 그리고 이전에 만들었던 모듈을 하나하나 수정해 줄 것이다.
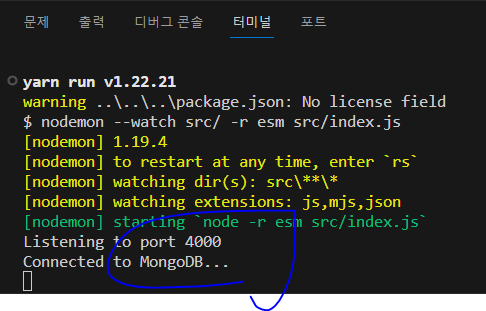
* 기존에 실행 중이던 서버는 종료하고, 다시 yarn start:dev 명령어를 입력하여 새로운 스크립트로 서버를 구동하자.
* 최신 버전과의 충돌이 나는 지점이 있다면 셋팅을 다음과 같이 하자
[package.json]
{
  "name": "blog-backend",
  "version": "1.0.0",
  "main": "index.js",
  "license": "MIT",
  "dependencies": {
    "dotenv": "^7.0.0",
    "eslint-config-prettier": "^4.1.0",
    "esm": "^3.2.22",
    "joi": "^14.3.1",
    "koa": "^2.7.0",
    "koa-bodyparser": "^4.2.1",
    "koa-router": "^7.4.0",
    "mongoose": "^5.5.2"
  },
  "devDependencies": {
    "eslint": "^5.16.0",
    "nodemon": "^1.18.11"
  },
  "scripts": {
    "start": "node -r esm src",
    "start:dev": "nodemon --watch src/ -r esm src/index.js"
  }
}
[.eslintrc.json]
{
    "env": {
      "commonjs": true,
      "es6": true,
      "node": true
    },
    "extends": ["eslint:recommended", "prettier"],
    "globals": {
      "Atomics": "readonly",
      "SharedArrayBuffer": "readonly"
    },
    "parserOptions": {
      "ecmaVersion": 2018,
      "sourceType": "module"
    },
    "rules": {
      "no-unused-vars": "warn",
      "no-console": "off"
    }
  }
* 온전히 구동된다면 다음과 같이 터미널 코드가 실행된다.
(1) 기존 코드 ES Module 형태로 바꾸기
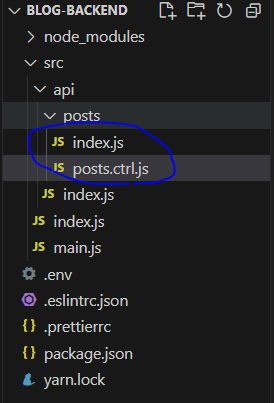
* 먼저 api/posts/posts.ctrl.js 파일을 열어서 exports 코드를 export const로 모두 변환하자.
...

export const write = (ctx) => {
	...
};

export const list = (ctx) => {
	...
};

export const read = (ctx) => {
	...
};

export const remove = (ctx) => {
	...
};

export const replace = (ctx) => {
	...
};

export const update = (ctx) => {
	...
};
* 다음으로 src/api/posts/index.js 파일을 수정하자.
import Router from 'koa-router';
import * as postsCtrl from './posts.ctrl.js';

const posts = new Router();

posts.get('/', postsCtrl.list);
posts.post('/', postsCtrl.write);
posts.get('/:id', postsCtrl.read);
posts.delete('/:id', postsCtrl.remove);
posts.put('/:id', postsCtrl.replace);
posts.patch('/:id', postsCtrl.update);

export default posts;
* 여기까지 코드를 작성하고 저장하면 서버에서 오류가 발생할 것이다. 이 오류는 파일 두 개를 더 수정하면 해결되니 걱정하지 말자.
* 이제 다음 두 파일을 수정하자.
[src/api/index.js]
import Router from 'koa-router';
import posts from './posts';

const api = new Router();

api.use('/posts', posts.routes());

// 라우터를 내보낸다.
export default api;
[src/main.js]
require('dotenv').config();
import Koa from 'koa';
import Router from 'koa-router';
import bodyParser from 'koa-bodyparser';
import mongoose from 'mongoose';

import api from './api';

// 비구조화 할당을 통해 process.env 내부 값에 대한 레퍼런스 만들기
const { PORT, MONGO_URI } = process.env;

mongoose
  .connect(MONGO_URI, { useNewUrlParser: true, useUnifiedTopology: true }) // useUnifiedTopology 추가
  .then(() => {
    console.log('Connected to MongoDB...');
  })
  .catch((e) => {
    console.error(e);
  });

const app = new Koa();
const router = new Router();

// 라우터 설정
router.use('/api', api.routes()); // api 라우트 적용

// 라우터 적용 전에 bodyParser 적용
app.use(bodyParser());

// app 인스턴스에 라우터 적용
app.use(router.routes()).use(router.allowedMethods());

// PORT가 지정되어 있지 않다면 4000을 사용
const port = PORT || 4000;
app.listen(port, () => {
  console.log('Listening to port %d', port);
});
* 이제 Postman으로 http://localhost:4000/api/posts에 요청을 보내 우리가 만든 서버가 오류 발생으로 종료되지 않고 잘 작동하는지 확인해 보자.
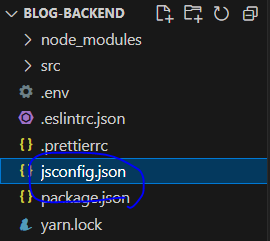
* 코드를 모두 작성하고 확인도 했으면, 마지막으로 프로젝트 루트 디렉터리에 jsconfig.json을 작성하자.
{
    "compilerOptions": {
      "target": "es6",
      "module": "es2015"
    },
    "include": ["src/**/*"]
}
* 이 파일을 위 코드와 같이 작성해 주면 나중에 자동 완성을 통해 모듈을 불러올 수 있다. src 디렉터리에 sample.js라는 파일을 작성하고, api를 입력했을 때 자동 완성할 수 있는 인텔리센스 창이 뜨는지 확인해 보자.
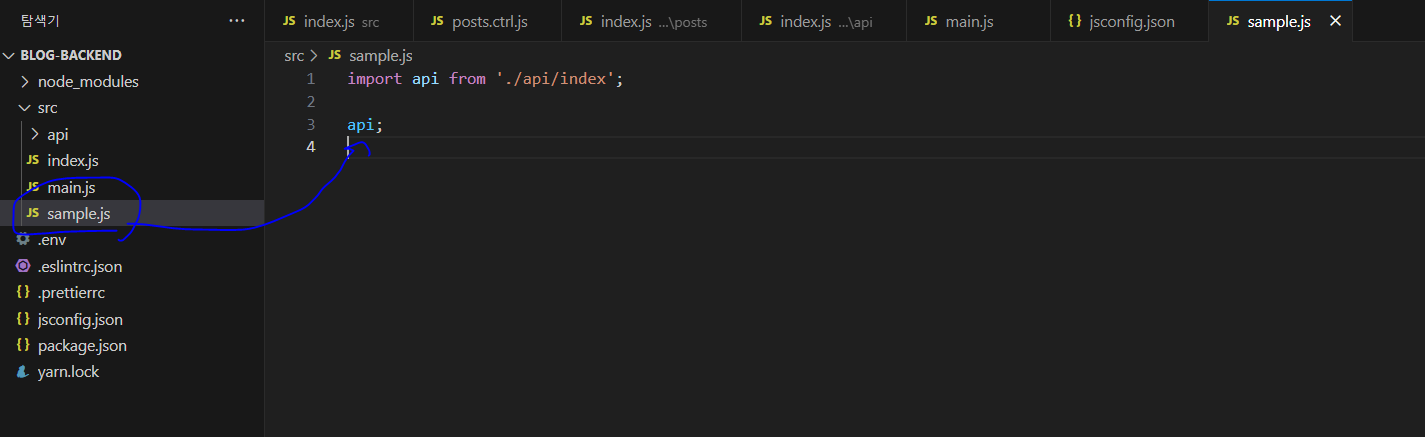
이 상태에서 enter를 누르면 import가 잘 될 것이다. 자동 완성이 잘 되지 않는다면 VS Code를 껐다가 다시 시작해 보자.
* 자동 완성이 잘 되는 것을 확인했다면 sample.js 파일은 삭제해 주자.
'React > React_백엔드 프로그래밍' 카테고리의 다른 글
| (17) mongoose를 이용한 MongoDB 연동 실습 6 (0) | 2024.02.20 |
|---|---|
| (16) mongoose를 이용한 MongoDB 연동 실습 5 (0) | 2024.02.20 |
| (14) mongoose를 이용한 MongoDB 연동 실습 3 (1) | 2024.02.20 |
| (13) mongoose를 이용한 MongoDB 연동 실습 2 (0) | 2024.02.20 |
| (12) mongoose를 이용한 MongoDB 연동 실습 1 (0) | 2024.02.20 |


