
| 일 | 월 | 화 | 수 | 목 | 금 | 토 |
|---|---|---|---|---|---|---|
| 1 | 2 | 3 | 4 | 5 | 6 | 7 |
| 8 | 9 | 10 | 11 | 12 | 13 | 14 |
| 15 | 16 | 17 | 18 | 19 | 20 | 21 |
| 22 | 23 | 24 | 25 | 26 | 27 | 28 |
- 제네릭
- 메소드오버로딩
- 예외처리
- 어윈 사용법
- 오라클
- Java
- 예외미루기
- 컬렉션 타입
- 환경설정
- 객체 비교
- 한국건설관리시스템
- 인터페이스
- 자바
- 자동차수리시스템
- 집합_SET
- 생성자오버로드
- 정수형타입
- cursor문
- 다형성
- NestedFor
- oracle
- 추상메서드
- GRANT VIEW
- abstract
- 사용자예외클래스생성
- 컬렉션프레임워크
- EnhancedFor
- 대덕인재개발원
- 참조형변수
- exception
- Today
- Total
거니의 velog
(13) 프론트엔드 프로젝트 : 글쓰기 기능 구현하기 4 본문
(3) 글쓰기 API 연동하기
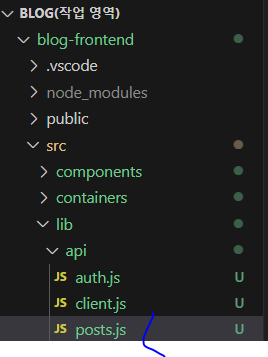
* 글쓰기에 관련된 상태들이 모두 리덕스에서 관리되고 있으니, 이제 글쓰기 API를 연동해 보자. 앞에서 회원 인증에 관련된 API를 요청하는 함수를 auth.js 라는 파일에 만들어 주었다. 이번에는 포스트에 관련된 API를 요청하는 함수를 posts.js 라는 파일에 작성해 보겠다. posts.js 파일을 lib/api 디렉터리에 생성하자.
[lib/api/posts.js]
import client from './client';

export const writePost = ({ title, body, tags }) =>
  client.post('/api/posts', { title, body, tags });
* 다음으로 이 함수를 호출하는 리덕스 액션과 사가를 준비한다.
[modules/write.js]
import { createAction, handleActions } from 'redux-actions';
import createRequestSaga, {
  createRequestActionTypes,
} from '../lib/createRequestSaga';
import * as postsAPI from '../lib/api/posts';
import { takeLatest } from 'redux-saga/effects';

const INITIALIZE = 'write/INITIALIZE'; // 모든 내용 초기화
const CHANGE_FIELD = 'write/CHANGE_FIELD'; // 특정 key 값 바꾸기
const [WRITE_POST, WRITE_POST_SUCCESS, WRITE_POST_FAILURE] =
  createRequestActionTypes('write/WRITE_POST'); // 포스트 작성

export const initialize = createAction(INITIALIZE);
export const changeField = createAction(CHANGE_FIELD, ({ key, value }) => ({
  key,
  value,
}));
export const writePost = createAction(WRITE_POST, ({ title, body, tags }) => ({
  title,
  body,
  tags,
}));

// saga 생성
const writePostSaga = createRequestSaga(WRITE_POST, postsAPI.writePost);
export function* writeSaga() {
  yield takeLatest(WRITE_POST, writePostSaga);
}

const initialState = {
  title: '',
  body: '',
  tags: [],
  post: null,
  postError: null,
};

const write = handleActions(
  {
    [INITIALIZE]: (state) => initialState, // initialState를 넣으면 초기상태로 바뀜
    [CHANGE_FIELD]: (state, { payload: { key, value } }) => ({
      ...state,
      [key]: value, // 특정 key 값을 업데이트
    }),
    [WRITE_POST]: (state) => ({
      ...state,
      // post와 postError를 초기화
      post: null,
      postError: null,
    }),
    // 포스트 작성 성공
    [WRITE_POST_SUCCESS]: (state, { payload: post }) => ({
      ...state,
      post,
    }),
    // 포스트 작성 실패
    [WRITE_POST_FAILURE]: (state, { payload: postError }) => ({
      ...state,
      postError,
    }),
  },
  initialState,
);

export default write;
* 리덕스 모듈을 수정한 후 writeSaga를 rootSaga에 등록하자.
[modules/index.js]
import { combineReducers } from 'redux';
import { all } from 'redux-saga/effects';
import auth, { authSaga } from './auth';
import loading from './loading';
import user, { userSaga } from './user';
import write, { writeSaga } from './write';

const rootReducer = combineReducers({
  auth,
  loading,
  user,
  write,
});

export function* rootSaga() {
  yield all([authSaga(), userSaga(), writeSaga()]);
}

export default rootReducer;
* 이제 포스트를 작성하는 API를 호출하기 위한 준비를 마쳤다. WriteActionButtonsContainer 를 만들어서 다음과 같이 구현해 보자.
[containers/write/WriteActionButtonsContainer.js]

import React, { useEffect } from 'react';
import WriteActionButtons from '../../components/write/WriteActionButtons';
import { useSelector, useDispatch } from 'react-redux';
import { withRouter } from 'react-router-dom';
import { writePost } from '../../modules/write';

const WriteActionButtonsContainer = ({ history }) => {
  const dispatch = useDispatch();
  const { title, body, tags, post, postError } = useSelector(({ write }) => ({
    title: write.title,
    body: write.body,
    tags: write.tags,
    post: write.post,
    postError: write.postError,
  }));

  // 포스트 등록
  const onPublish = () => {
    dispatch(
      writePost({
        title,
        body,
        tags,
      }),
    );
  };

  // 취소
  const onCancel = () => {
    history.goBack();
  };

  // 성공 혹은 실패시 할 작업
  useEffect(() => {
    if (post) {
      const { _id, user } = post;
      history.push(`/@${user.username}/${_id}`);
    }
    if (postError) {
      console.log(postError);
    }
  }, [history, post, postError]);
  return <WriteActionButtons onPublish={onPublish} onCancel={onCancel} />;
};

export default withRouter(WriteActionButtonsContainer);
* 이 컴포넌트에서는 포스트 등록 버튼을 누르면 현재 리덕스 스토어 안에 들어 있는 값을 사용하여 새 포스트를 작성한다. 그리고 history 객체를 사용하여, 취소 버튼을 누르면 브라우저에서 뒤로 가기를 하도록 만들었다. 라우트가 아닌 컴포넌트에서 history 객체를 사용하기 위해 withRouter로 컴포넌트를 미리 감싸 준 다음에 컨테이너를 만들어 주었다.
* 포스트 작성이 성공했을 때는 서버에서 응답한 포스트 정보의 _id와 username 값을 참조하여 포스트를 읽을 수 있는 경로를 만든 뒤, history.push 를 사용하여 해당 경로로 이동한다.
* 컴포넌트를 다 만들었으면 WritePage에서 기존 WriteActionButtons 컴포넌트를 WriteActionButtonsContainer 로 대체시키자.
[pages/WritePage.js]
import React from 'react';
import Responsive from '../components/common/Responsive';
import EditorContainer from '../containers/write/EditorContainer';
import TagBoxContainer from '../containers/write/TagBoxContainer';
import WriteActionButtonsContainer from '../containers/write/WriteActionButtonsContainer';

const WritePage = () => {
  return (
    <Responsive>
      <EditorContainer />
      <TagBoxContainer />
      <WriteActionButtonsContainer />
    </Responsive>
  );
};

export default WritePage;
* 대체시킨 뒤, 글쓰기 페이지에서 제목, 내용, 태그를 입력하고 포스트 등록 버튼을 눌러 보자.


* 포스트 작성에 성공했다면 위 이미지와 같이 포스트 읽기 페이지가 나타나야 한다. 또 주소 부분에 계정명과 포스트 id가 있고, 리덕스 개발자 도구로 write.post 값을 확인했을 때 그 안에 포스트 데이터가 담겨 있어야 한다.
4. 정리
* 이것으로 포스트 작성을 위한 개발을 모두 마쳤다! WritePage와 관련된 컴포넌트들은 나중에 수정 기능을 구현할 때 다시 한 번 수정한다.
* 다음 장에서는 포스트 조회 기능을 구현해 볼 것이다. 포스트 읽기 페이지와 포스트 목록 페이지를 구현하고, 페이지네이션까지 구현할 것이다.
'React > React_프론트엔드 프로젝트' 카테고리의 다른 글
| (15) 프론트엔드 프로젝트 : 포스트 조회 기능 구현하기 2 (0) | 2024.02.23 |
|---|---|
| (14) 프론트엔드 프로젝트 : 포스트 조회 기능 구현하기 1 (0) | 2024.02.23 |
| (12) 프론트엔드 프로젝트 : 글쓰기 기능 구현하기 3 (0) | 2024.02.23 |
| (11) 프론트엔드 프로젝트 : 글쓰기 기능 구현하기 2 (0) | 2024.02.23 |
| (10) 프론트엔드 프로젝트 : 글쓰기 기능 구현하기 1 (0) | 2024.02.23 |


