
| 일 | 월 | 화 | 수 | 목 | 금 | 토 |
|---|---|---|---|---|---|---|
| 1 | 2 | 3 | 4 | 5 | 6 | 7 |
| 8 | 9 | 10 | 11 | 12 | 13 | 14 |
| 15 | 16 | 17 | 18 | 19 | 20 | 21 |
| 22 | 23 | 24 | 25 | 26 | 27 | 28 |
- 예외처리
- 집합_SET
- 컬렉션프레임워크
- 생성자오버로드
- 제네릭
- 다형성
- abstract
- 인터페이스
- Java
- 정수형타입
- 메소드오버로딩
- 자동차수리시스템
- cursor문
- oracle
- 컬렉션 타입
- exception
- 객체 비교
- 대덕인재개발원
- 한국건설관리시스템
- 오라클
- NestedFor
- 예외미루기
- 참조형변수
- 환경설정
- EnhancedFor
- 사용자예외클래스생성
- 어윈 사용법
- 추상메서드
- 자바
- GRANT VIEW
- Today
- Total
거니의 velog
(18) 컴포넌트의 라이프사이클 메서드 2 본문
3. 라이프사이클 메서드 사용하기
* 이전에 살펴본 라이프사이클 메서드를 직접 사용해 본다. 이번 실습은 다음 흐름으로 진행된다.

(1) 예제 컴포넌트 생성
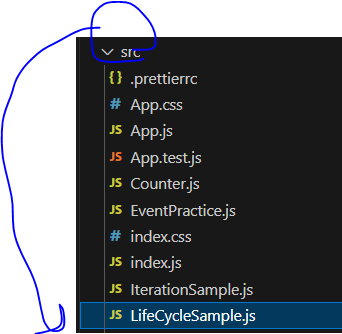
src 디렉터리에 LifeCycleSample.js라는 컴포넌트를 만들자.
import React, { Component } from 'react';

class LifeCycleSample extends Component {
  state = {
    number: 0,
    color: null,
  };

  myRef = null; // ref를 설정할 부분

  constructor(props) {
    super(props);
    console.log('constructor');
  }

  static getDerivedStateFromProps(nextProps, prevState) {
    console.log('getDerivedStateFromProps');
    if (nextProps.color !== prevState.color) {
      return { color: nextProps.color };
    }
  }

  componentDidMount() {
    console.log('componentDidMount');
  }

  shouldComponentUpdate(nextProps, nextState) {
    console.log('shouldComponentUpdate', nextProps, nextState);
    // 숫자의 마지막 자리가 4면 리렌더링하지 않는다.
    return nextState.number % 10 !== 4;
  }

  componentWillUnmount() {
    console.log('componentWillUnmount');
  }

  handleClick = () => {
    this.setState({
      number: this.state.number + 1,
    });
  };

  getSnapshotBeforeUpdate(prevProps, prevState) {
    console.log('getSnapshotBeforeUpdate');
    if (prevProps.color !== this.props.color) {
      return this.myRef.style.color;
    }
    return null;
  }

  componentDidUpdate(prevProps, prevState, snapshot) {
    console.log('componentDidUpdate', prevProps, prevState);
    if (snapshot) {
      console.log('업데이트되기 직전 색상 : ' + snapshot);
    }
  }

  render() {
    console.log('render');

    const style = {
      color: this.props.color,
    };

    return (
      <div>
        <h1 style={style} ref={(ref) => (this.myRef = ref)}>
          {this.state.number}
        </h1>
        <p>color: {this.state.color}</p>
        <button onClick={this.handleClick}>더하기</button>
      </div>
    );
  }
}

export default LifeCycleSample;
* 이 컴포넌트는 각 라이프사이클 메서드를 실행할 때마다 콘솔 디버거에 기록하고, 부모 컴포넌트에서 props로 색성을 받아 버튼을 누르면 state.number 값을 1씩 더한다.
* getDerivedStateFromProps는 부모에게서 받은 color 값을 state에 동기화하고 있다. 그리고 getSnapshotBeforeUpdate 는 DOM에 변화가 일어나기 직전의 색상 속성을 snapshot 값으로 반환하여 이것을 componentDidUpdate에서 조회할 수 있게 했다.
* 추가로 shouldComponentUpdate 메서드에서 state.number 값의 마지막 자리 수가 4이면(예: 4, 14, 24, 34, ...) 리렌더링을 취소하도록 설정했다.
(2) App 컴포넌트에서 예제 컴포넌트 사용
* App.js 파일에 있던 기존 코드를 지우고, 다음 코드를 작성하자.
import React, { Component } from 'react';
import LifeCycleSample from './LifeCycleSample';

// 랜덤 색상을 생성한다.
function getRandomColor() {
  return '#' + Math.floor(Math.random() * 16777215).toString(16);
}

class App extends Component {
  state = {
    color: '#000000',
  };

  handleClick = () => {
    this.setState({
      color: getRandomColor(),
    });
  };

  render() {
    return (
      <div>
        <button onClick={this.handleClick}>랜덤 색상</button>
        <LifeCycleSample color={this.state.color} />
      </div>
    );
  }
}

export default App;
* getRandomColor 함수는 state의 color 값을 랜덤 색상으로 설정한다. 16777215를 hex로 표현하면 ffffff 가 되므로 해당 코드는 000000부터 ffffff 값을 반환한다.
* 버튼을 렌더링하고, 누를 때마다 handleClick 메서드가 호출되게 이벤트를 설정하며, 불러온 LifeCyleSample 컴포넌트에 color 값을 props로 설정한다.
* 코드를 저장하면 다음 결과물이 나타난다.
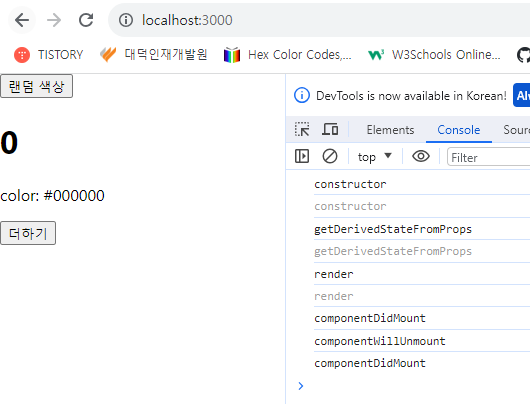
* React.StrictMode 적용
- 이전에 언급했던 React.StrictMode가 적용되어 있으면 일부 라이프사이클이 두 번씩 호출된다.
개발 환경에서만 두 번씩 호출되며 프로덕션 환경에서는 정상적으로 호출되니 안심하자.
만약 여기 나오는 스크린샷과 다른 결과물을 보고 싶다면, index.js를 열어서 React.StrictMode를
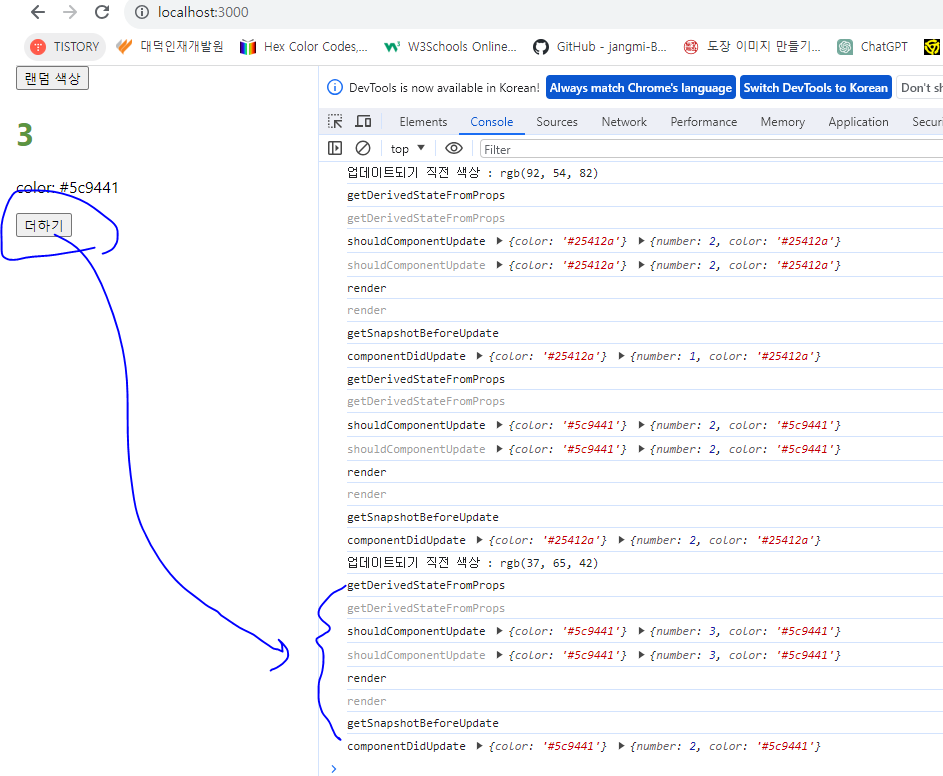
제거하고 App 컴포넌트만 렌더링 하면 된다.* 렌더링이 잘 되었는가? 그렇다면 위쪽 버튼과 아래쪽 버튼을 번갈아 누르면서 어떤 라이프사이클 메서드들을 실행하는지 체크해 보자. 마지막 자리 수가 4일 때는 업데이트를 취소하는 지도 확인해 보자.


(3) 에러 잡아내기
* 방금 만든 LifeCycleSample 컴포넌트의 render 함수에서 의도적으로 에러를 한번 발생시켜 보자. render 함수에서의 에러는 주로 존재하지 않는 함수를 사용하려고 하거나, 존재하지 않는 객체의 값을 조회하려고 할 때 발생한다.
LifeCycleSample 의 render 함수를 다음과 같이 수정해 보자.
import React, { Component } from 'react';

class LifeCycleSample extends Component {
  state = {
    number: 0,
    color: null,
  };

  myRef = null; // ref를 설정할 부분

  constructor(props) {
    super(props);
    console.log('constructor');
  }

  static getDerivedStateFromProps(nextProps, prevState) {
    console.log('getDerivedStateFromProps');
    if (nextProps.color !== prevState.color) {
      return { color: nextProps.color };
    }
  }

  componentDidMount() {
    console.log('componentDidMount');
  }

  shouldComponentUpdate(nextProps, nextState) {
    console.log('shouldComponentUpdate', nextProps, nextState);
    // 숫자의 마지막 자리가 4면 리렌더링하지 않는다.
    return nextState.number % 10 !== 4;
  }

  componentWillUnmount() {
    console.log('componentWillUnmount');
  }

  handleClick = () => {
    this.setState({
      number: this.state.number + 1,
    });
  };

  getSnapshotBeforeUpdate(prevProps, prevState) {
    console.log('getSnapshotBeforeUpdate');
    if (prevProps.color !== this.props.color) {
      return this.myRef.style.color;
    }
    return null;
  }

  componentDidUpdate(prevProps, prevState, snapshot) {
    console.log('componentDidUpdate', prevProps, prevState);
    if (snapshot) {
      console.log('업데이트되기 직전 색상 : ' + snapshot);
    }
  }

  render() {
    console.log('render');

    const style = {
      color: this.props.color,
    };

    return (
      <div>
        {this.props.missing.value}
        <h1 style={style} ref={(ref) => (this.myRef = ref)}>
          {this.state.number}
        </h1>
        <p>color: {this.state.color}</p>
        <button onClick={this.handleClick}>더하기</button>
      </div>
    );
  }
}

export default LifeCycleSample;
* 존재하지 않는 props인 missing 객체의 value를 조회해서 렌더링해 주려고 한다. 이렇게 하면 당연히 브라우저에는 에러가 발생한다. 한번 확인해 보자.

* 저장하고 나면 위 그림과 같이 에러가 발생할 것이다. 이렇게 어디에서 에러가 발생했는지 알 수 있는 정보가 나타난 것은 우리가 현재 개발 서버를 실행 중이기 때문이다.
* 만약 사용자가 웹 서비스를 실행할 때 이렇게 흰 화면만 나타나면 어리둥절할 것이다. 이럴 때는 에러가 발생했다고 사용자에게 인지시켜 주어야 한다.
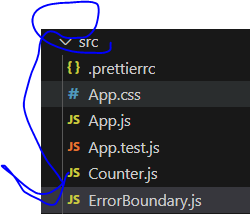
* 지금부터는 에러를 잡아 주는 ErrorBoundary라는 컴포넌트를 생성해 보자. src 디렉터리에 ErrorBoundary.js 파일을 생성하고 다음과 같이 입력해 보자.
import React, { Component } from 'react';

class ErrorBoundary extends Component {
  state = {
    error: false,
  };
  componentDidCatch(error, info) {
    this.setState({
      error: true,
    });
    console.log({ error, info });
  }
  render() {
    if (this.state.error) return <div>에러가 발생했습니다!</div>;
    return this.props.children;
  }
}

export default ErrorBoundary;
* 에러가 발생하면 componentDidCatch 메서드가 호출되며, 이 메서드는 this.state.error 값을 true로 업데이트 해 준다. 그리고 render 함수는 this.state.error 값이 true 라면 에러가 발생했음을 알려 주는 문구를 보여 준다.
* 이제 이 컴포넌트를 사용해 App.js 에서 LifeCycleSample 컴포넌트를 감싸 주자.
import React, { Component } from 'react';
import LifeCycleSample from './LifeCycleSample';
import ErrorBoundary from './ErrorBoundary';
// 랜덤 색상을 생성한다.
function getRandomColor() {
return '#' + Math.floor(Math.random() * 16777215).toString(16);
}
class App extends Component {
state = {
color: '#000000',
};
handleClick = () => {
this.setState({
color: getRandomColor(),
});
};
render() {
return (
<div>
<button onClick={this.handleClick}>랜덤 색상</button>
<ErrorBoundary>
<LifeCycleSample color={this.state.color} />
</ErrorBoundary>
</div>
);
}
}
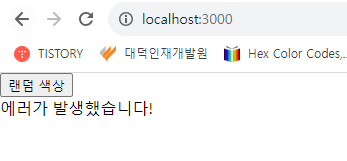
export default App;* 이렇게 코드를 작성하고 저장한다. 여전히 조금 전처럼 붉은 에러 박스가 보이겠지만, X 버튼을 누르면 다음과 같이 '에러가 발생했습니다!' 라는 문구가 보일 것이다.
4. 정리
* 컴포넌트의 라이프사이클 메서드 흐름을 한번 한눈에 확인해 보자.

* 라이프사이클 메서드는 컴포넌트 상태에 변화가 있을 때마다 실행하는 메서드이다. 이 메서드들은 서드파티 라이브러리를 사용하거나 DOM을 직접 건드려야 하는 상황에서 유용하다. 추가로 컴포넌트 업데이트의 성능을 개선할 때는 shouldComponentUpdate가 중요하게 사용된다.
* shouldComponentUpdate를 사용하여 컴포넌트의 업데이트 성능을 개선하는 내용은 이후에 다루어 보겠다.
'React > React_리액트 시작' 카테고리의 다른 글
| (20) Hooks 2 (1) | 2023.12.04 |
|---|---|
| (19) Hooks 1 (0) | 2023.12.04 |
| (17) 컴포넌트의 라이프사이클 메서드 1 (0) | 2023.12.04 |
| (16) 컴포넌트 반복 2 (1) | 2023.12.01 |
| (15) 컴포넌트 반복 1 (0) | 2023.12.01 |


